Equipment
Get to know the 20|20's Equipment setup menu.
Updated January 28, 2022
The Equipment setup menu is where you go to tell your 20|20 about the physical implement you're working with and the basic systems you'll be using on it, like seeding, nitrogen, or starter.
This menu should be the first place you visit whenever you change something about your implement, whether that's just adding hardware or switching to a new implement entirely. The reason is simple: the 20|20 uses the information here to customize your experience throughout the software.
If the information in the Equipment menu is incorrect or incomplete, you may not have access to important settings elsewhere.
Table of Contents
Find the Equipment Setup Menu
As its name implies, the Equipment setup menu is accessible from the main Setup menu, which you can reach from anywhere by tapping Home (if you're not already on the home screen) and then Setup.
Once on the Setup page, tap on either the implement details card on the right or the Equipment button in the sidebar. Either one will take you to the Equipment setup page.
Set Up a New Implement
If you have a new implement you need to set up on your 20|20 from scratch, this section will walk you through the steps.
Set the Implement Type
Before you do anything else, you need to make sure the 20|20 knows what kind of implement it's working with: Planter, Air Seeder, Sidedress Bar, or Combine.
When you first arrive in the Equipment setup menu, confirm that you're working with the correct Implement Type by looking just above the Home button in the sidebar. If the implement type listed there is wrong, tap on the button and switch to the correct one.
Update the Implement Profile
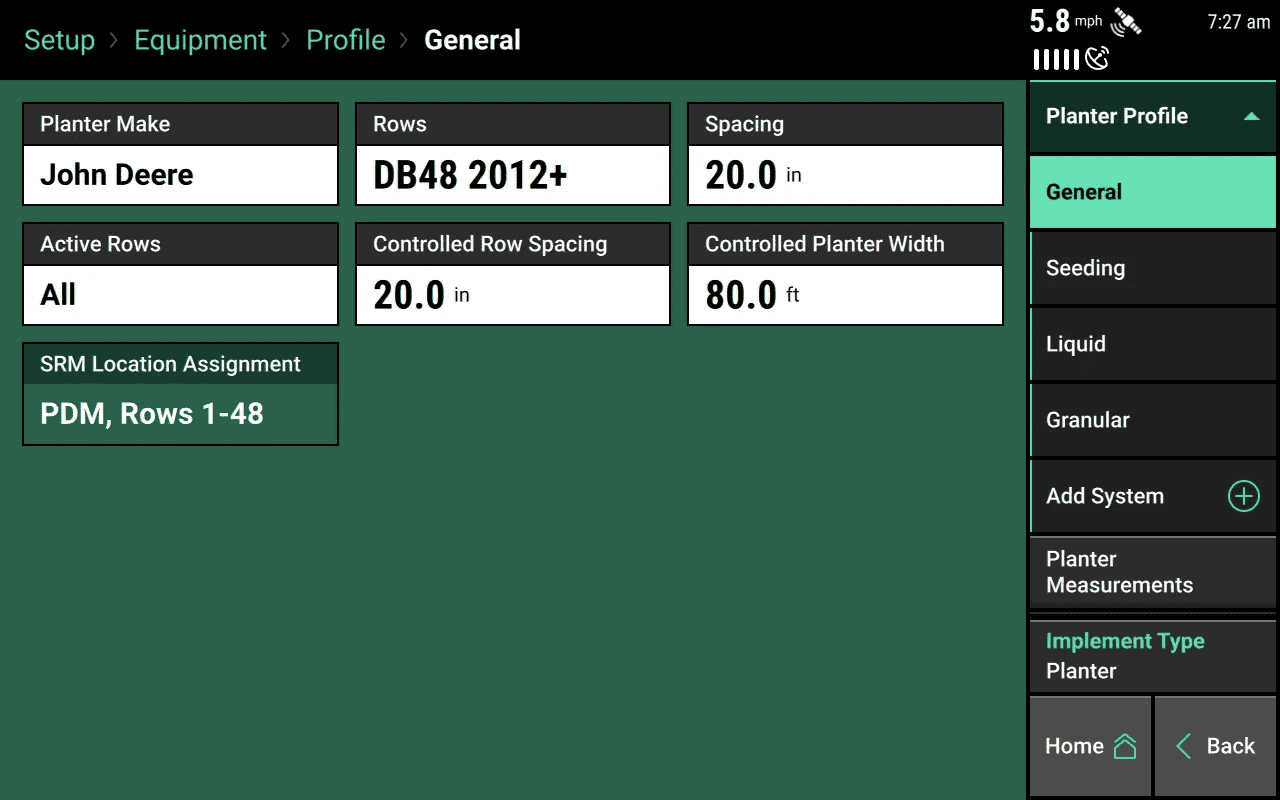
Different makes and models require different configuration. To make sure that your 20|20 shows you the correct options, you need to give it some general information about your implement on the implement Profile page.
On that page, you'll see a number of input boxes, each of which you can set just by tapping on it.
You won't need to enter all of these manually, since the 20|20 will do the math and update related values. If you change the number of rows, for example, it will update the implement width by multiplying the number of rows by the spacing between them. In order to take full advantage of this cleverness, you should update values in normal reading order, from left to right and top to bottom.
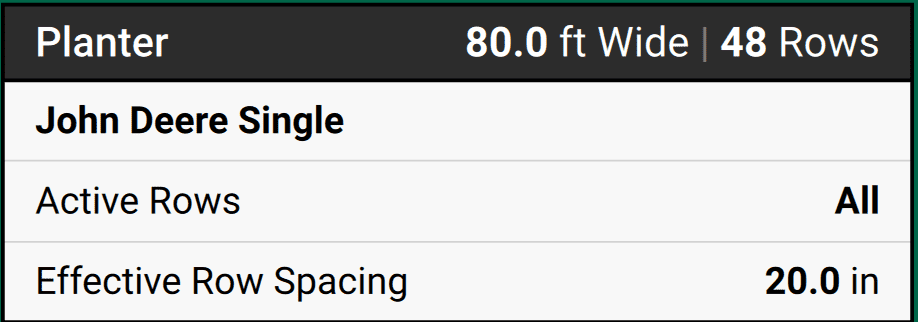
On a combine, this task is very simple: just enter the make, series, and model. If you're on a planter, air seeder, or sidedress bar, though, you'll be asked for a bit more information, such as:
- the number of rows on the implement (Rows)
- how far apart they are (Spacing)
- which ones are active (Active Rows)
- how far apart the rows controlled by the 20|20 are (Controlled Row Spacing)
- how wide the controlled implement is (Controlled
Width ) - where your Single Row Modules are located (SRM Location Assignment, also called SRM Assignments on an air seeder)
- how many seeding towers there are (Seeding Towers, only on air seeders)
- how Single Row Modules are ordered (SRM Mapping, only on air seeders set to Bulk Fill)
- the width of the end rows (End Rows Width Adjustment, only on sidedress bars)
Add Systems to the Implement
In order to control or monitor anything on your implement, the 20|20 needs to know it exists. The Equipment setup menu is where you do that, by tapping Add System in the sidebar and then entering the required details.
Your goal here is just to let the 20|20 know what systems it will be monitoring and controlling, without worrying about how or with what hardware those systems work. For example, you might say here that you've got a liquid herbicide system, but later on (in the Systems menu) you'll specify that this system will be controlled using vApplyHD and vApply Rate Control modules.
It can be confusing at first to know when to go to the "systems" listed in the Equipment menu and when to go to the Systems menu itself. Just remember that Equipment is a prerequisite to Systems. What you add here will immediately show up under Systems to be configured. But if you never add it here, you won't find it in Systems (and Crops too).
To put it differently, the Equipment menu is where you go to tell your 20|20, "I've got X, Y, and Z systems on this planter. Make sure you show me settings for them on any pages where they matter, but don't bother showing me settings for other systems, because I don't have them." This also helps the 20|20 remember which of your implements have which systems on them (more on this below).
When you tap Add System, a popup will list a few basic categories of system: Seeding, Down Force, Liquid, Granular, Soil Sensing, Depth, Closing, and Row Cleaner. Select the one that you'd like to add, and you will be taken to a new page, where you can get more specific.
Next you need to confirm some details. Usually, you'll do this by tapping Add Product at the bottom of the screen. For Down Force and Soil Sensing, though, you'll have to tap on the input field at the top of the page and update it to reflect the correct information.
Selecting a system in the Add System popup is only the first step in a two-step process. If you navigate away without completing the second step, the system will not be added.
Add Measurements
Tractors and implements vary greatly. Instead of guessing how tall your tractor is or what frame layout you have attached to it, the 20|20 asks you to tell it exactly how everything is arranged and measured.
In the Equipment menu sidebar, you should see a few measurement-related menu items, depending on your implement type. For example, on a planter, you would see:
- Planter Measurements
- Tractor Measurements
- GPS Offset Check
- Frame Layout
Tap through each one in turn, ensuring that the information listed is correct.
As usual, you should enter information in normal reading order (from the top left to the bottom right) so that the 20|20 can adapt later options to suit your needs. When things get complicated, the 20|20 will also guide you by displaying diagrams and walking you through step-by-step instructions. For greatest accuracy when entering measurements, don't make any assumptions. Get out your tape measure and check each value by hand. That will ensure that the 20|20 is able to give you the level of precision it is designed for.
Depending on your settings, there may be more information on a given page than the monitor can fit onscreen at one time. Make sure to check for scrolling if a page looks full.
When you get to Frame Layout in the sidebar (if you're on a planter), you're done with the configuration. This page is just a quick double-check for you to see that everything is set up correctly. What you see on this page should exactly match the physical layout of your implement. If it doesn't, you'll have to go back to the Planter Measurements page to adjust it.
Switch Between and Reuse Implement Configurations
If you're switching implements (or tractors), it can be a pain to have to reconfigure everything. Luckily, the 20|20 will help you if you need to make this switch very often. You can save an implement profile, then create a new one (or as many as you need), and eventually switch back at the tap of a button.
When you save an implement configuration, you are saving all the data under the implement profile page and the implement measurements page, as well as all systems that have been added to the implement. When you save a tractor configuration, you are only saving the tractor measurements.
Save Your Current Configuration
If you know you'll want to reuse your current configuration in the future, you should save it.
First, tap Save/Load in the sidebar. (You may need to scroll the sidebar to see this option.) Then, select which configuration you want to save – tractor or implement – using the tabs at the top of the screen. Finally, tap the large button near the top of the screen, Save Current
Once you've hit Enter, the configuration will appear on the page, ready to use in the future. You can now safely change any settings you like, and it won't affect the saved configuration. Simply come back and tap Load to restore things to the way they were before.
Edit and Resave an Old Configuration
As noted above, once you've saved a configuration, you can immediately begin changing settings, and the saved configuration will not change. But what if you want it to change? Maybe you added a new system. What then?
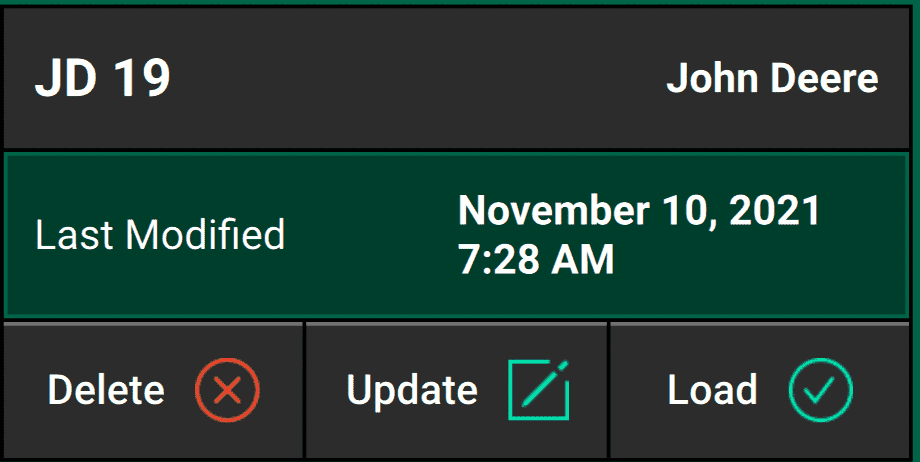
Thankfully, you don't have to create a new profile and delete the old one. You can update it to match your current settings. Simply navigate back to the Save/Load page, and you should notice that the old configuration now has an asterisk by it. That asterisk means that the configuration is out of date, compared to your current configuration. Now tap Update and, after confirming your choice, the asterisk will disappear. You have successfully updated the configuration.
Actually, you can update any configuration, not just the active one. Simply hit update on the configuration that you want to change.
Switch Between Saved Configuration
Once you have a saved configuration, you can use it any time. Simply tap Load and confirm your choice. The configuration will then become active, and all equipment settings will change to match it.
You can tell which, if any, configuration is active by looking for the highlighted (bright mint green) configuration. If all configurations are grey, none are active.
In order to load a configuration here, it must already be saved on your 20|20. If you would like to import a configuration from a different system, you must first import it.