Setup Menu Overview
Confidently navigate the 20|20's setup menu, knowing when to go where to get everything configured the way you need it.
Updated January 28, 2022
Although we have dedicated articles on each individual menu, this article should give you a more general overview of how they all fit together – when to go to one menu rather than another.
If you're just looking for a quick reference, you can skip to the bottom of the article.
Table of Contents
Navigate the Setup Menu Landing Page
Let’s take a step back and get a better understanding of just how the Setup menu is laid out. When you press Setup from the home screen, you should see a page that looks something like this:
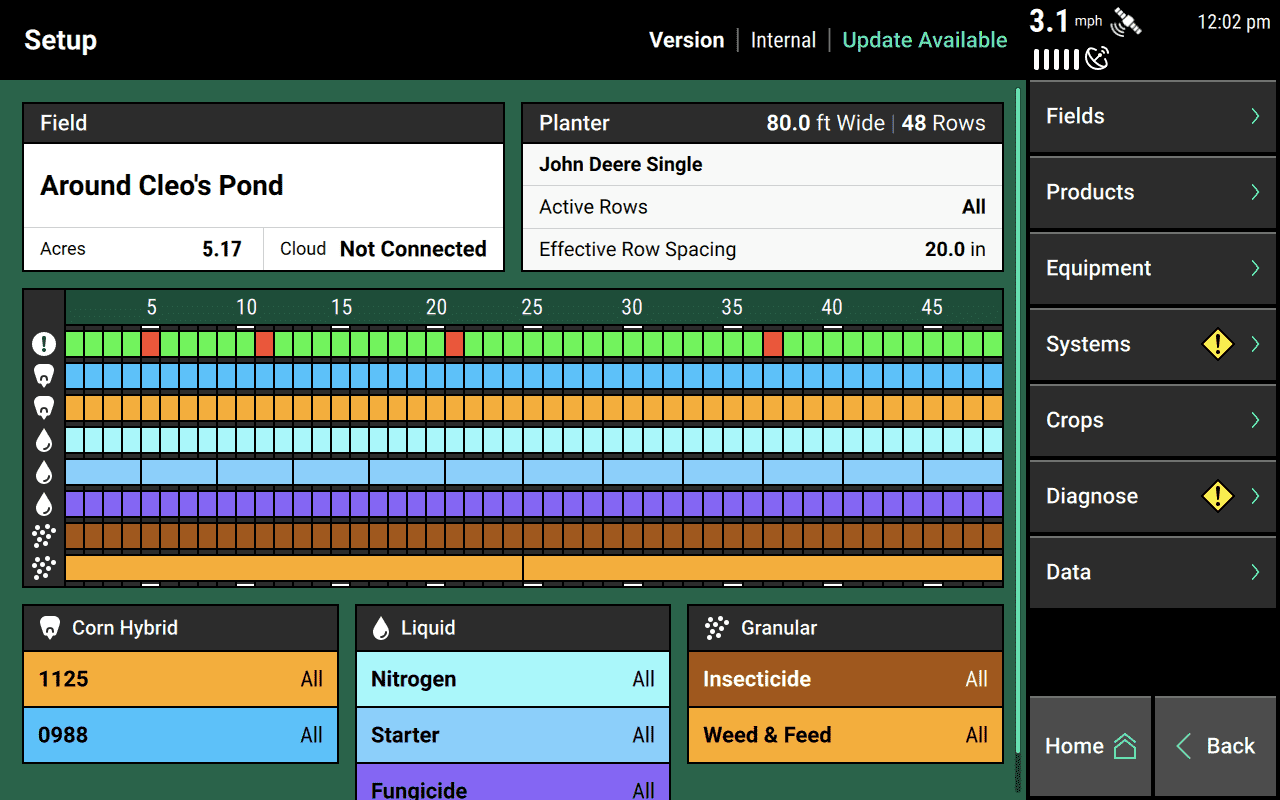
As you can see, there’s a lot going on here. Most of it is there to let you quickly check whether everything is set up correctly, without needing to dive into each specific menu.
Let’s take a look at each part of the page.
Check the Active Field Preview
First, the box at the top left:
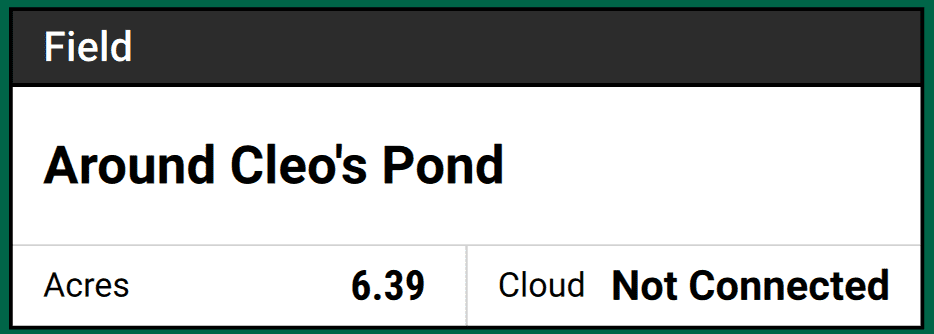
This box provides an overview of your currently active field. In our example, the grower named the field ”Around Cleo’s Pond,” but you’ll see whatever name you chose for your active field. Then in the lower left, you’ll see a running tally of how many acres you’ve covered since making the field active.
In the lower right, you’ll see your Cloud status (in our example, that’s Not Connected). If connected, you could rest assured that your field data is being uploaded to the cloud as you work. You can tap on that Cloud corner of the box to connect to WiFi or set up your 20|20 Cloud account.
Tapping anywhere else in the box will take you to the Fields menu, where you can change to a different field, if necessary.
Check the Equipment Preview
Now let’s look at the Planter box in the upper right of the page:
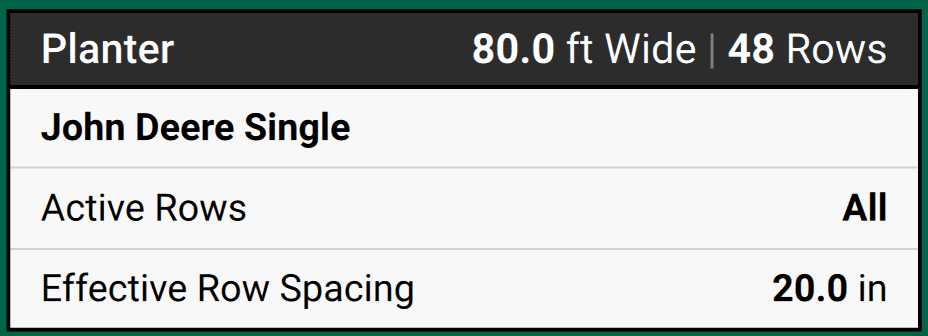
This box provides a snapshot of your implement to help you notice if you have any glaring problems with your settings in the Equipment setup menu.
Specifically, it shows:
- what type of implement you’re working with (in this example, Planter)
- how wide it is (80.0 ft)
- how many rows it has (48)
- the implement make (John Deere)
- the frame type (Single)
- which rows are active (All)
- and how far apart the active rows are (20.0 in)
All of this information is configured in the Equipment setup menu, and tapping on this box will take you there so you can change it.
Check the Diagnose Preview
In the middle of the page is a large chart, but let’s look at the top row alone first.

This row gives you a preview of your Diagnose menu. It shows the overall health of each row on your implement. In this image, a 48-row planter has mostly functioning rows, but there are problems on rows 5, 11, 21, and 37.
You want this whole part of the chart to be green. If you see any other colors here, you should dive into the Diagnose menu to investigate.
Look Over the Systems Preview
Below the Diagnose row on the chart, you’ll see one row for each application-type system you have added under the Equipment setup menu (such as seeding, liquid, and granular systems).
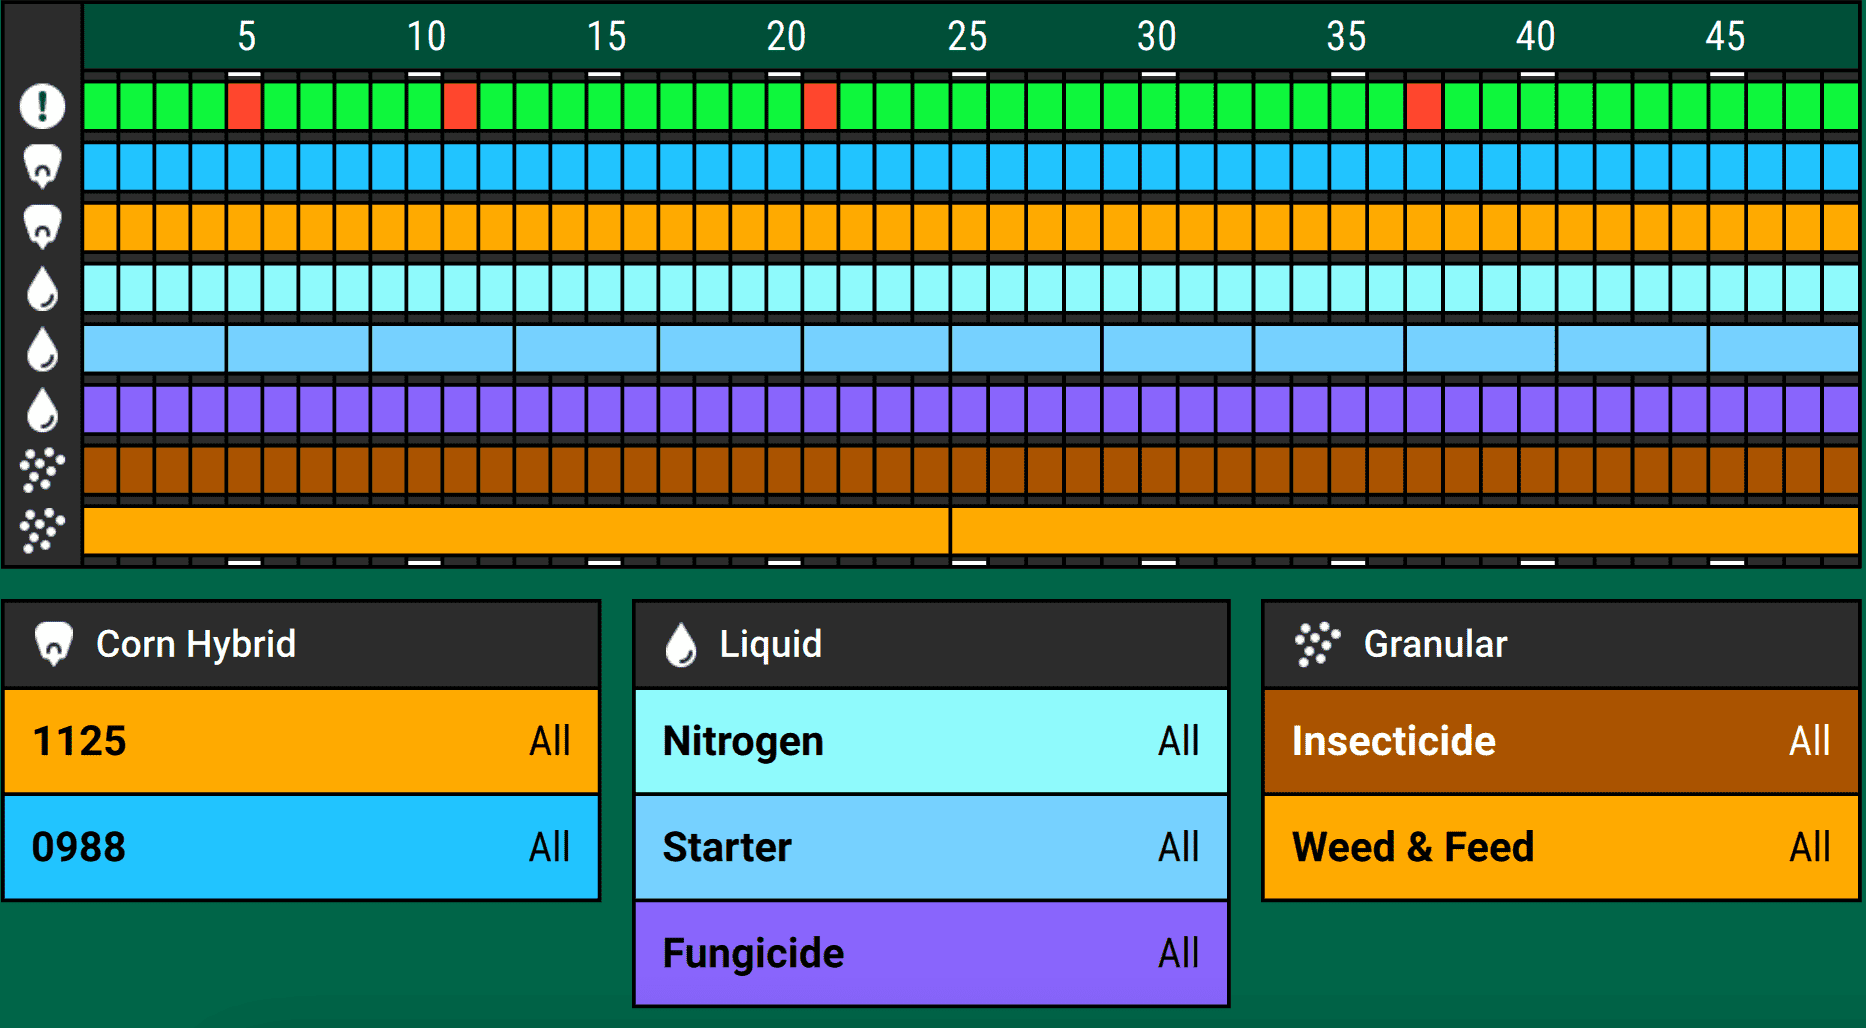
The colors on this part of chart map onto the colors in the legends below (one legend for each system type – seeding, liquid, and granular). The second row down in our example is bright blue, so it corresponds to the Corn Hybrid named 0988.
There are three things to look for on this chart:
- Make sure all the systems you expect are listed.
- Make sure that, in the legend, the active rows are correct. In our example, all systems are running on All rows.
- Make sure that each system is divided into the right number and size of row-assignment groups. These are represented by vertical lines. In our example, the bottom row — Weed & Feed — is divided in two, because it only has two control modules associated with it, each controlling half the implement. But the Nitrogen system has each row functioning independently.
You can tap on the Hybrids box to go to the Products setup menu, where you can change the hybrid assignments for each tank.
Note the Sidebar Warning Icons
If you look again, you can see that we have two warning icons in the sidebar in our example:
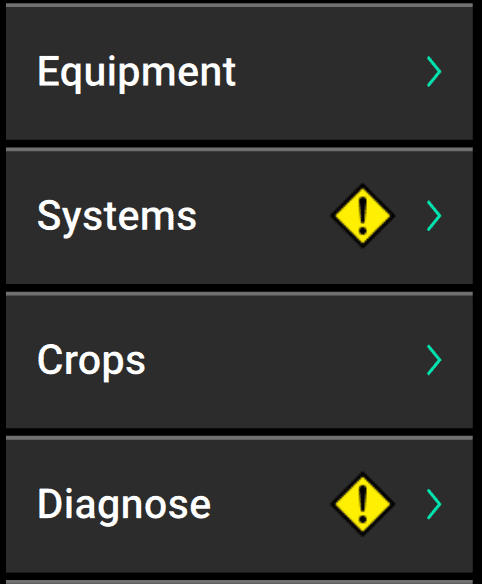
These indicate problems inside those menus that need your attention.
Apparently, some system hasn’t been fully configured. Let’s look inside the Systems menu to see what. Here’s what we find:
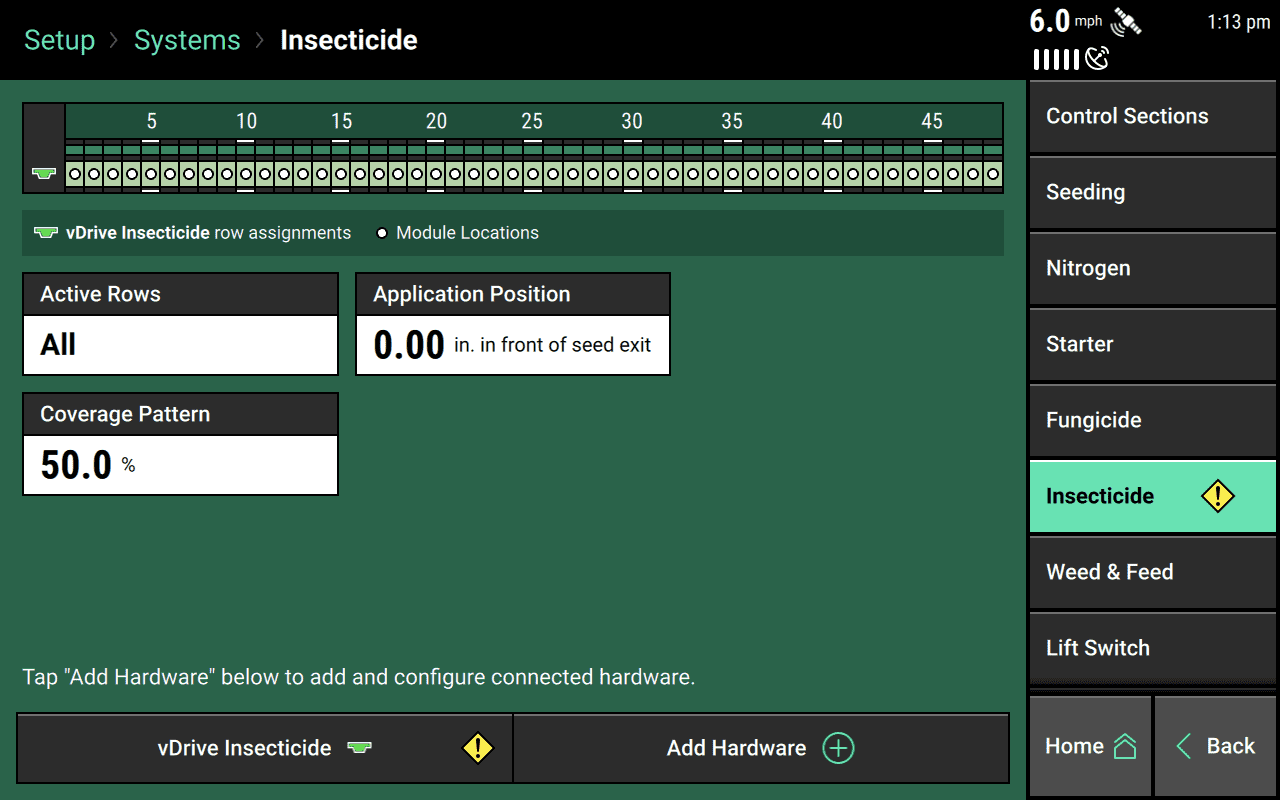
It turns out, our vDrive Insecticide needs further configuration. We notice that by first going to the item in the sidebar with the icon, then looking within the page for the icon again. If we press that vDrive Insecticide button, we’ll be walked through the configuration process again, and we can look for the missing information.
Understand the Menu Hierarchy
If you’re new to the 20|20, one thing that may initially puzzle you is that settings in one menu can change the available settings in another menu. In other words, order matters. So you should always start at the “top” and work your way down.
Here’s a diagram of how the different menus in the sidebar affect each other:
|--Fields
|-- Equipment
|  |-- Systems
|  |-- Crops
|  |  |-- Products
|  |-- Diagnose
|-- Data
If all you’re changing is the active field, then you don’t have to worry about other menus. But if you want to change the current hybrid in Products, you have to make sure that the right crop is active in Crops. And if you want to configure an alert for a system in Crops, you have to make sure the system was added to the implement in Equipment.
Most of the time, you won’t have to worry about this hierarchy, since your Equipment settings won’t change often. But it’s good to be aware that the hierarchy exists, especially when you’re first setting the 20|20 up, just to avoid any potential confusion.
Get Familiar With Common Patterns
As we saw above, the order you visit different menus matters, especially when you’re first setting up your 20|20. So here are two common sequences to familiarize yourself with:
Add or Configure New Hardware
Always start with Equipment to add systems, then go to Systems to configure them, then Diagnose to verify that they’re set up correctly, and then (optionally) Crops to configure alerts and alarms.
Get Ready for the Field
Always double check Diagnose. Then double check and/or update the active field in Fields, the active crop in Crops, and the active hybrids in Products.
Update Software
Go to the Data menu to update software.
Troubleshoot Common Setup Problems
You Don’t See a Widget for a Specific System
If you don’t see a widget for a system on your home screen, you may need to add it. Remember that the home screen layout is totally customizable to suit your needs.
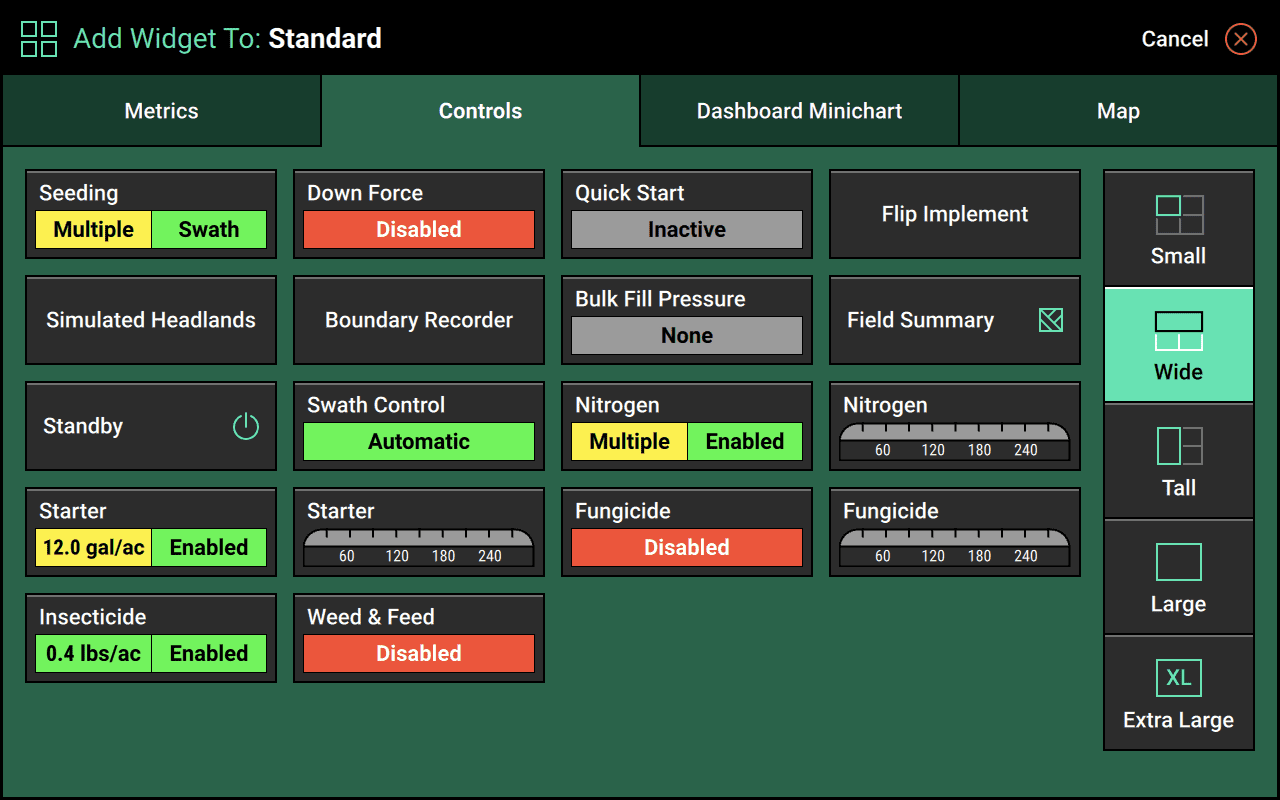
If you go to add a widget, and you don’t see it right away, it may be that you need to look through other widget types and sizes. Remember you can switch between widget types using the tabs running along the top of the Add Widget page, and you can switch between sizes using the buttons on the right.
If you look through all sizes, and you still don’t see your system, then that system probably hasn’t been added properly under Equipment. Go back to make sure that the initial setup is correct.
You Can’t Enable Control Products
If you are trying to start applying product, but you find that nothing is happening, there are a few things you you check:
- Toggle the Master switch on your Cab Control Module to dismiss any lingering safety warnings
- Make sure the section swath switches on your Cab Control Module are not all turned off.
- Make sure that you have control sections and swath control style configured on the Systems menu landing page.
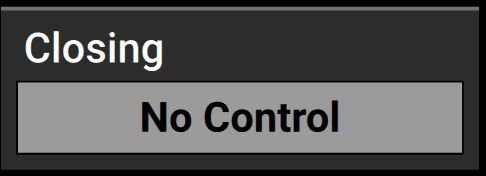
If you see a control widget that says No Control, that means that your system needs to have control hardware added to it in the Systems menu.
Quick Reference for Menu Actions
If you already have an idea what you’re trying to do, here’s quick overview of where to go in the Setup menu sidebar to do it. (Click on any menu name to learn more about it.)
-
- Change active field
- Add prescriptions and boundaries to a field
-
Products
- Change hybrids for current crop
-
- Configure tractor and implement
- Add systems to the implement (so they show up elsewhere in the 20|20)
-
- Enable control (via control sections and swath control style)
- Add hardware to each system
- Configure each system’s major settings
- Change settings for the display
-
- Change active crop
- Set alert and alarm thresholds for each system
-
Find shortcuts to quickly change crop-related settings in other menus like
- active rows
- default population
- population adjustment increments
- swath coverage pattern
-
- Check that all systems are operating and communicating properly
- Drill down on any problems to investigate
- Perform health checks in the shop
-
- Update software
- Import data and settings from other devices
- Export or delete data and settings