GPS, WiFi, and DBM Connections
Get to know the 20|20's GPS, WiFi, and Display Base Module connectivity settings.
Updated January 28, 2022
From any page, you can access the menu for your GPS, WiFi, and DBM connections by tapping the speed and status bar in the top right corner of the screen.
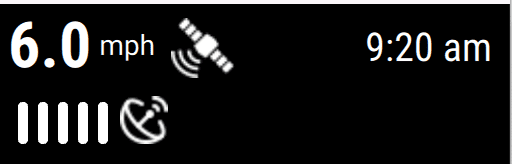
Table of Contents
Check GPS Signal Quality
To verify that your GPS signal is strong, tap the speed in the upper right corner of the screen from any page. You'll see a number of data points, and a few are worth paying special attention to:
- Communication Quality should be above 80%
- The Satellite in View number should be no lower than three
- HDOP (Horizontal Dilution of Precision) should be as low as possible, preferably between 0 and 2
- The Baud Rate should be either 19200 or 3840 (if it's not, adjust the system outputting GPS accordingly)
- Under NMEA Messages Received, GGA, RMC (or ZDA), and VTG should all be 5 Hz (additional NMEA messages may degrade the GPS quality by overwhelming the system with too much information)
You can get a quick overview of GPS connection quality from any page just by looking at the speed and status bar in the upper right. If the connection is good, you should see a white receiver icon. If it is yellow or red, you should visit this connection menu to diagnose the problem.

Set Up WiFi Connection
If you want to use cloud-based features such as satellite imagery, data backups, or software updates, you need your 20|20 to be connected to WiFi.
To set up your connection, tap the speed and status bar in the top right of the screen, then tap 20|20 Cloud in the sidebar.
Once on the 20|20 Cloud setup page, you can see which network you're connected to in the upper left input field, labeled Connected Network. If it says None or another incorrect value, tap it to bring up a list of available networks. Choose the network you want and enter your password.
If you don't see the correct network listed, you can refresh the list by tapping Scan at the bottom of the popup.
Connect to a Mobile Device
If you install 20|20 Connect on your mobile device, you can use it to communicate with your 20|20 while outside the cab, performing health checks directly from the planter (as long as the planter is near the tractor cab).
Open the 20|20 Connect app on your phone or tablet. Then, in the 20|20, tap on the speed and status bar in the top right and then on 20|20 Connect in the sidebar. Once there, scan the QR code using the app. After the code has been scanned, you will be connected and can begin using the app to perform health checks.
Set Up Cloud Backups
To back up your coverage data to the cloud, tap on the speed and status bar in the top right of the screen and then 20|20 Connect in the sidebar.
In the middle of the page, under Cloud Setup you should see a toggle switch between Cloud Backup Enabled and Cloud Backup Disabled.
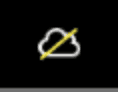
You can tell at a glance from any page whether your cloud connection is working by looking at the speed and status bar in the top right.
If you are connected to a valid cloud account, a white cloud icon will appear under the time. If something is wrong with the connection, the cloud will turn red. And if you have cloud backup disabled on the setup page, a yellow line will appear to "cross out" the cloud.
Change Between Grid and Satellite Images for Map Backgrounds
If you're connected to WiFi, you can switch the background imagery on your maps widgets between a grid and satellite images.
Go to the WiFi setup page by tapping the speed and status bar in the top right of the screen, followed by 20|20 Cloud in the sidebar. At the bottom of that page, you'll see the two options listed under Map Background Style. Press the one you want to make active.
Check DMB Connection Quality
If you are having issues where the 20|20 is not mapping product that you know it is actually applying, you may want to verify that the Gen3 Display has a good connection with the Display Base Module (DBM) and that the automatically generated .2020 files are transferring properly.
To check this, tap the speed and status bar in the top right of the screen and then DBM Connectivity in the sidebar.
Adjust and Correct GPS Signals
If you know that your GPS signal is systematically off, then to compensate you can adjust how the 20|20 interprets the GPS data it receives. This an advanced setting, though, and you should not mess with it unless you are sure of what you are doing (such as when instructed by a dealer or Precision Planting Product Support).
To get to the adjustment page, tap the speed and status bar in the top right of the screen and then GPS Nudge and Corrections in the sidebar.
Nudge Your Map Data a Few Units Over
If your map data is suffering from GPS shift, you can nudge the map in any direction using the +1 and -1 buttons on the screen. Each time you press one, the map is moved over by one unit of measurement (inches, if you're using imperial units). Alternatively, you can directly enter directional offsets using the North/South and East/West input boxes.
Determine Speed and Heading by Calculation Instead of Directly from GPS
If you have a lower-grade GPS system, GPS speed may not be accurate by itself, so you can tell the 20|20 to calculate your speed instead by tapping the input box on the bottom left, Bad GPS Correction and then selecting Use Calculated Speed. Alternatively, you can disable speed measurement entirely here as well.
You can also make the same adjustments for heading by tapping the Heading Mode input.
Change Minimum GPS Quality Percentage for Mapping
If you'd like to restrict what the 20|20 will map so that it only maps when the quality of GPS data is high, you can adjust the Correction Level input to High.
Change Which NMEA Packet is Primary
If the 20|20 is having issues with the GGA message coming from your GPS source, a dealer or product support specialist may direct you to switch the primary NMEA packet to RMC. Do this by tapping the Primary Packet input box. GGA is Normal, but you can Force RMC to be primary instead.