Granular
Learn how to set up and use your granular system.
Updated February 8, 2022
Granular systems help you monitor and control your granular application from the cab. That way you can keep an eye on things like flow rate and blockage sensing so that you can respond in real time, or even use a prescription and let the 20|20 do all the adjusting for you.
vApply Rate Control, Blockage Sensors, and vDrive Insecticide can be combined or used independently to achieve the amount of control and monitoring sensitivity you want.
Table of Contents
Set Up a Granular System
Set up your Granular system the same way you would other new systems:
-
In the Equipment setup menu, add a new Granular system.
- Tap Add System in the sidebar.
- Select Granular in the popup.
- Press the Add Product button at the bottom.
- Choose a name for your granular system. The 20|20 will give you a number of default options, but your choice does not affect any behavior. It’s just a nickname.
-
In the Systems setup menu, add all hardware associated with the system you just created.
- In the Systems menu sidebar, tap the name that you chose in step 1d above.
- Press the Add Hardware button at the bottom of the page.
- Select the module that you’d like to add: vApply Rate Control, Blockage Sensor, or vDrive Insecticide.
-
Select the rows where you have installed that module.
For vDrive Insecticide, you will also have to configure the Meter Type and Cal Mass for each row as well as an optional Adjustment Percent.
- Repeat steps b-d for other modules, if applicable.
-
Still in the same Systems setup menu, configure any settings that apply to the system as a whole.
- Decide which rows should be active for this system (Active Rows).
- Select the Application Position where your granular product is applied, relative to the seed exist.
- Select a Coverage Pattern to determine how much overlap will count as entering previous coverage and trigger a swath section to turn off.
-
In the Diagnose menu, make sure that everything is green.
- If not, troubleshoot using the usual color coding and other more system-specific diagnose information (discussed below).
Operate the Granular System
Add a Control Widget to Home Screen
To access the control page for a Granular System, you’ll need a control widget on your home screen if there isn’t already one there. Once you’ve got one, you can tap it any time to get to the control page.
Enable Granular System Control
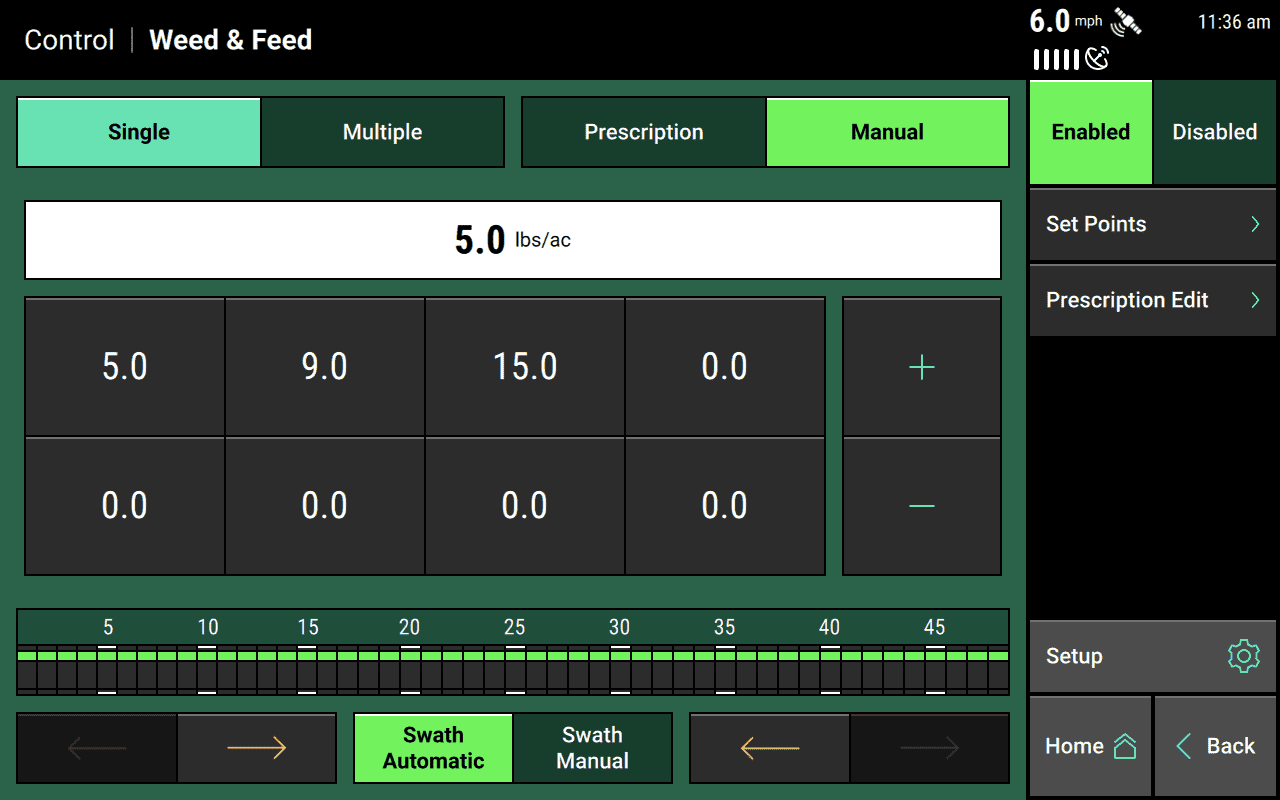
To enable control for your Granular system, go to its control page by tapping on the control widget on your home screen assigned to your system. Look for the name you assigned to the system during setup. (If you don’t see that widget, you may need to add it first.)
Then press Enabled on the toggle button in the top right corner of the page.
Adjust the Target Rate
Monitor System Performance
Add Metrics Widgets to the Home Screen
To keep an eye on how your Granular system is performing, you may want to add a Granular system metrics widget to your home screen.
Additionally, you can configure your Dashboard Mini-Chart to show you Granular System metrics on a row-by-row basis, either all the time or on a rotating basis (swapping out other metrics at a regular interval).
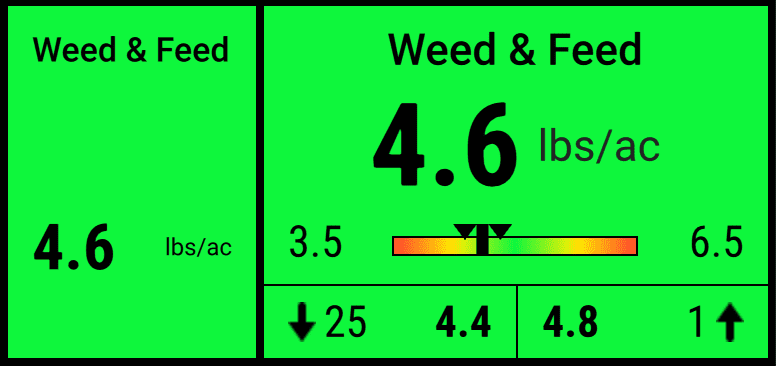
A tall and a large granular system metric widget next to each other. This same widget is also available in wide and extra-large sizes.
View Granular System Map Layers
To help you keep track of your granular system’s performance, there are two map layers available on your home screen:
- Flowing: <Granular System Name> shows whether product is flowing at all on a given row.
- <Granular System Name> shows how much product is being applied per acre on each row.
Set Up Alerts and Failure Warnings
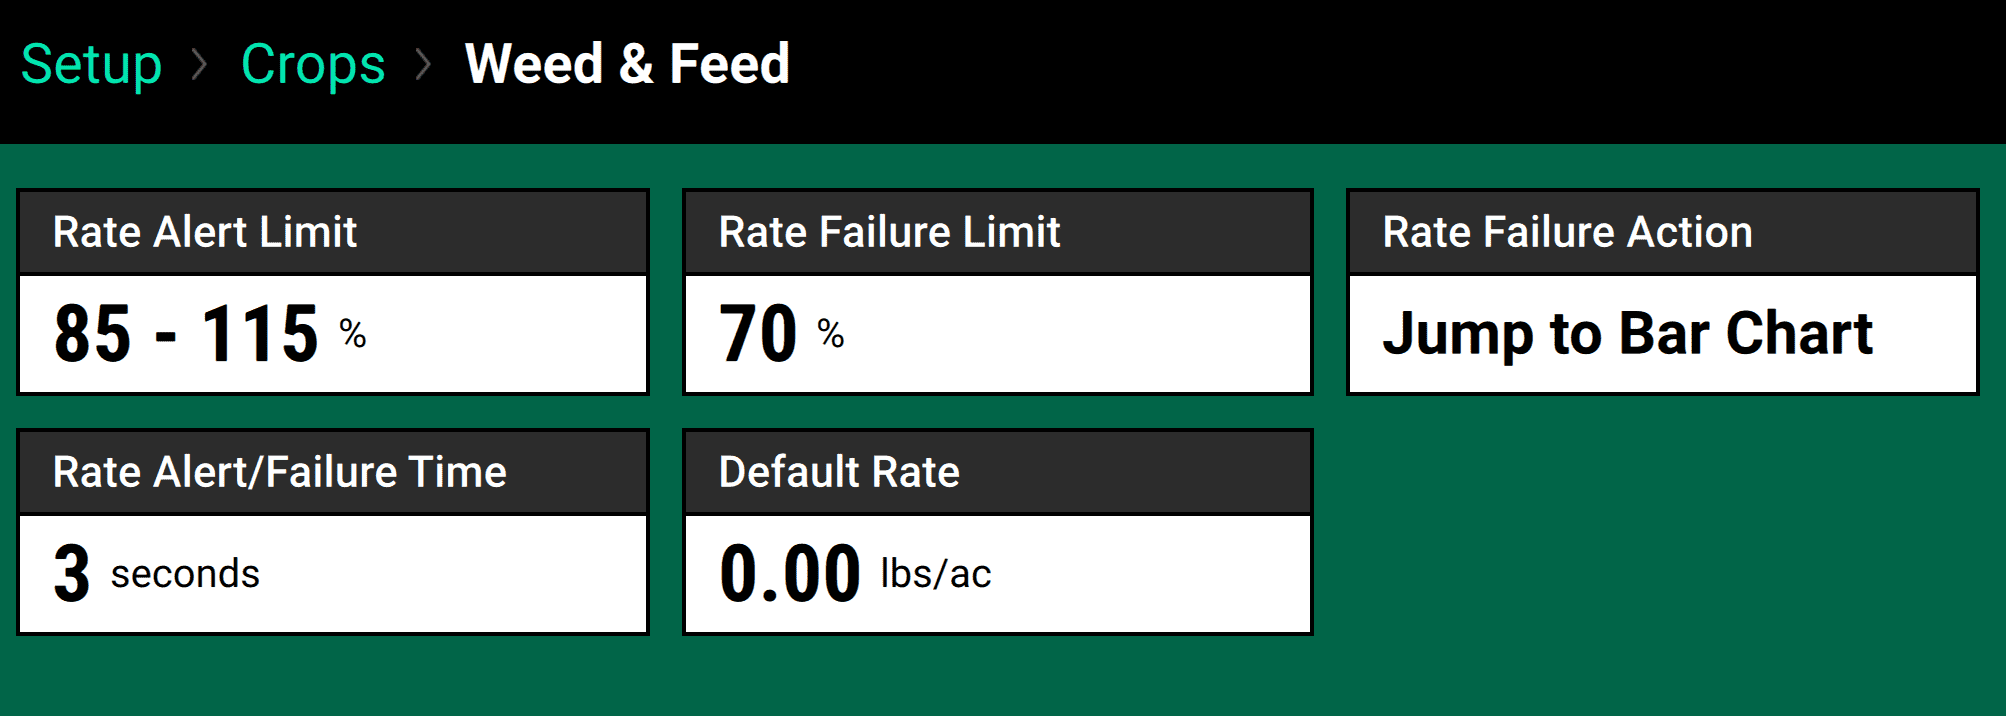
To help you know immediately if something goes wrong with your system, you can also configure alert and failure limits.
Go to the Crops setup menu, then press the name of your granular system in the sidebar. You’ll be taken to a page like the one below.
Diagnose a Granular System
Understand Diagnostics Metrics for vApply Rate Control
- Row — The row where the module is
- Rate — The actual, measured rate at the module
- Rate Command — The expected rate based on what the 20|20 is commanding
- Motor Speed — The actual motor speed
- Speed Command — The expected speed
- Duty Cycle — Percent of time the motor circuit is on
- Supply Volts — Voltage at module
Understand Diagnostics Metrics for Blockage Sensors
- Row — The row where the module is
- Flow
- Supply Volts — Voltage at module
Understand Diagnostics Metrics for vDrive Insecticide
- Row — The row where the module is
- RPM Actual — The actual, measured revolutions per minute
- RPM Cmd — The expected revolutions per minute, based on the command given by the 20|20
- Supply Volts — Voltage at module
- Drive Amps — The module’s current draw in amps
- Duty Cycle — Percent of time the motor circuit is on