Closing
Learn how to set up and use your closing system.
Updated February 8, 2022
Setting your closing system correctly is tough. FurrowForce is a two-stage closing system that adapts to your planting conditions to remove air pockets and firm soil to keep moisture, giving you confidence that your crops will germinate the best that they can.
Table of Contents
Set Up a Closing System
Set up your Closing system the same way you would other new systems:
-
In the Equipment setup menu, add a new Closing system.
- Tap Add System in the sidebar.
- Select Closing in the popup.
- Press the Add Product button at the bottom.
- Select Closing again in the popup.
-
In the Systems setup menu, add all hardware associated with the system you just created.
- In the Systems menu sidebar, tap Closing.
- Press the Add Hardware button at the bottom of the page.
- Select the module type you want to add: FurrowForce Controller, FurrowForce Sensor, or Tank Pressure Sensor.
- Select the rows where you have installed modules.
- Repeat steps b-d for other modules, if applicable.
-
Still in the same Systems setup menu, configure any settings that apply to the system as a whole.
- Decide which rows should be active for this system (Active Rows).
-
Choose whether your Control Strategy should be Aggressive or Slow.
The 20|20 defaults to an aggressive control strategy to help you get the most from your closing system, and you should only change to slow in consultation with product support or a dealer if you find that the system is overcompensating due to soil conditions that are changing too quickly and irregularly.
- Set Max and Min Pressure for the system.
-
In the Diagnose menu, make sure that everything is green.
- If not, troubleshoot using the usual color coding and other more system-specific diagnose information (discussed below).
Operate the Closing System
Add a Control Widget to Home Screen
To access the control page for Closing, you’ll need a control widget on your home screen if there isn’t already one there. Once you’ve got one, you can tap it any time to get to the control page.
Control widgets are available for Closing systems in Wide, Tall, and Large sizes. They all tell you whether your system is enabled, and, if so, what its current target is. Additionally, the large-size widgets also let you bump the system target up or down without leaving your home screen.
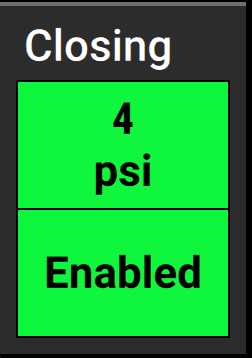
Enable Closing System Control
To enable control for your Closing system, go to its control page by tapping on the control widget on your home screen. (If you don’t see that widget, you may need to add it first.)
Then press Enabled on the toggle button in the top right corner of the page.
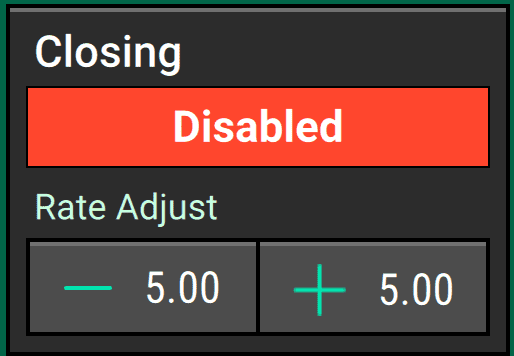
Adjust the Pressure Manually
If you want complete control over the pressure being applied by your closing system, you can set a fixed pressure that the system will always apply.
To set this value, use the slider on the left of the control page to adjust it. The pressure will increase as you slide downwards, mimicking the behavior of the system pressing down into the soil.
Alternatively, you can use the stepper buttons (+ and -) or tap on the white input box to enter a value manually.
Let the 20|20 Adjust Target Pressure Automatically
When you set the target pressure manually, you are setting a fixed pressure to apply, no matter how much actual, measured pressure that ends up resulting in.
Alternatively, though, you can tell the 20|20 a target pressure that you’d like it to try to hit, adjusting the pressure it applies in order to achieve that.
If you opt for this automatic control, toggle the switch at the top of the page to Automatic. The system comes with three preset configurations: Light, Standard, and Heavy, but you can also use these as a jumping off point for fine-tuning the target pressure. Just use the same stepper buttons and slider as on the manual page.
Monitor System Performance
Add Metrics Widgets to the Home Screen
To keep an eye on how your Closing system is performing, you may want to add a Closing metrics widget to your home screen. Closing metrics are only available in large and extra-large widgets, and they closely resemble Down Force widgets.
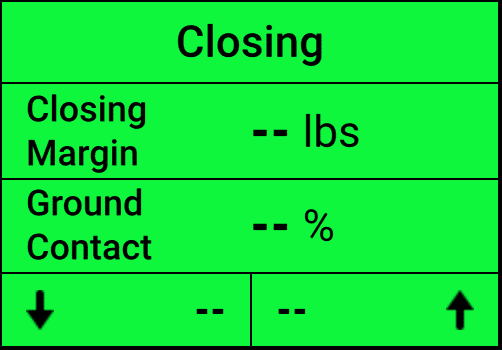
A large or extra-large metrics widget for the Closing system
These widgets display four useful data points:
- Margin takes the lowest load cell reading in the last five seconds from each row and averages it across the whole implement.
- Ground Contact estimates the percentage of time the system was planting at the desired depth. In practice, that means the percentage of time where the load is at least 20 pounds.
- Low tells you the lowest weigh-pin reading on a single row, while High tells you the opposite: the highest weigh-pin reading on a single row.
Additionally, you can configure your Dashboard Mini-Chart to show you Closing metrics on a row-by-row basis, either all the time or on a rotating basis (swapping out other metrics at a regular interval).
View Closing Map Layers
You can switch your home screen map to show you two layers for your Closing System:
- Closing Margin maps the minimum weight measured from each load cell within the past fifth of a second. A blue stretch represents a loss of ground contact.
- Closing Act. Pressure maps the actual pressure measured across the closing system.
Diagnose Closing System
Understand Diagnostics Metrics for FurrowForce
Go to the Diagnose menu, then tap Closing System in the sidebar. On the Closing System diagnose page, you’ll find the following diagnostic metrics for each FurrowForce module:
- Row — the row where the module is installed
- Sensor Supply Volts — the voltage at the sensor
- Control Supply Volts — the voltage at the control module
- Reading — the current weight measured on that row
-
Load Cell Status — the status of each load cell.
- Press this value for any row to disable (ignore) the load cell on that row or to enable it again once disabled
- If a load cell is ignored, that row will control DeltaForce to the 80th percentile of all other properly operating rows
- Reference Value — value determined automatically by the 20|20 when you zero the FurrowForce modules
- Cmd Pressure — the expected pressure commanded by the 20|20 based on the target pressure that you set
- Actual Pressure — the actual pressure sensed by the system