SpeedTube
Learn how to set up and use SpeedTube modules with the 20|20.
Updated January 28, 2022
SpeedTubes ensure that you can plant quickly without worrying about seeds bouncing around and landing where you don’t want them.
Read on to learn how to take full advantage of SpeedTubes with your 20|20.
Table of Contents
Set Up SpeedTubes
Set up SeedTube similar to how you would set up any other new module:
-
In the Equipment setup menu, add a SmartDepth to your Seeding system.
- In the Equipment menu sidebar, tap Seeding.
- Tap on the Seed Sensor Type input field at the top of the page.
- Select SpeedTube in the popup.
-
In the Systems setup menu, add all hardware associated with the system you just created.
- In the Systems menu sidebar, tap SpeedTube.
- Press the Add Hardware button at the bottom of the page.
- Select SpeedTube.
- Select the rows where you have installed SpeedTube modules.
-
Still in the same Systems setup menu, configure any settings that apply to the system as a whole.
- Choose which rows should be active for this system (Active Rows).
-
Choose whether SpeedTubes should automatically reverse belt direction to clear any jams they detect (SpeedTube Auto-Unjam).
There are two other settings on this page, but you should not change them unless directed to do so by a dealer or a product support specialist.
-
In the Diagnose menu, make sure that everything is green.
- If not, troubleshoot using the usual color coding and other more system-specific diagnose information (discussed below).
-
Still in the Diagnose menu, perform a health check.
- In the Diagnose sidebar, tap Health Checks.
-
Press the Manual Test button under Seeding.
For more detailed information about health checks, see below.
Operate SpeedTubes
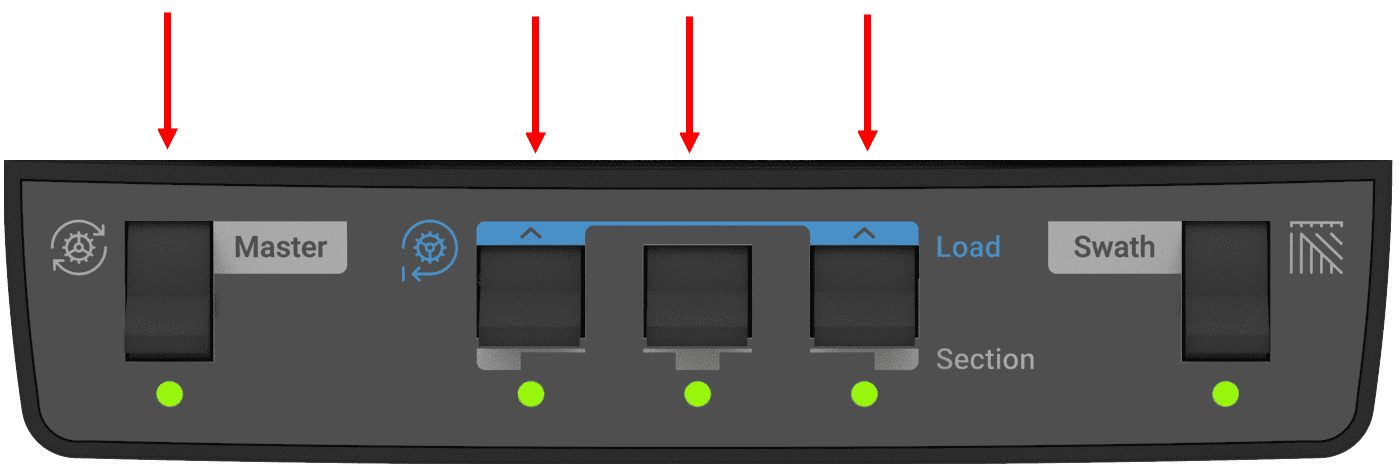
SpeedTubes will operate automatically anytime the Master switch or a single Section switch is active (flipped up) on the Cab Control Module; they will just slow down to minimum belt speed when the planter is not moving.
To deactivate SpeedTubes entirely, turn off the Master switch and all three Section switches.

Cab Control Module with Master and section switches highlighted
Sometimes, when operating SpeedTube at higher speeds, you may need to increase the vacuum using the tractor hydraulics. This will help prevent seeds from dropping off the disk (due to the rougher ride) before they reach the feeder wheels.
Perform Diagnostics and Health Checks
Perform Regular Health Checks
You should always perform a health check after installing SpeedTubes or after they have been sitting unused for a long time.
-
Before beginning, make sure that you have:
- Turned on the tractor
- Flipped up the Master switch on your Cab Control module
- Loaded your planter with seeds
- Turned on the hydraulics for the vacuum system
- Go to Diagnose menu, and make sure that everything is green.
- If it is, tap Health Checks in the sidebar.
-
Then press the Manual Test button under Seeding.
As the label suggests, this health check is for the whole seeding system, not just SpeedTubes, but this article will just focus on the SpeedTube portion.)
- Switch to the SpeedTube tab at the top of the page, if you’re not already on it, and see how each module is performing using the diagnostic chart on the page.
Understand the Diagnostic Metrics
As with other systems, the Diagnose and Health Check pages for SpeedTube cover the same basic information. For each row, you can see its performance in terms of:
- Flights per Second (Act) – Actual SpeedTube belt speed, measured in the number of belt flights (cycles) per second
- Flights per Second (Cmd) – Expected belt speed, given the current command setting
- Stability – Consistency of module operation
- Supply Volts – Voltage at SpeedTube module
- Drive Amps – The module’s current draw in amps
- Duty Cycle – Percent of time the motor circuit is on
- Total Seeds– Cumulative number of seeds planted on that row
Troubleshoot Unexpected Values
As usual, if a row is red, that means that the 20|20 is unable to establish normal communication with the module. And if a row is yellow, one of the values is outside of the expected range. In that case, you can check the values against the following expectations:
-
Supply Volts should be less than 10
- if it’s not, check harnessing for damage and ensure alternator is operating
-
Drive Amps should be:
- more than 0.5 when operating at 30 Flights per Second
- more than 4 when operating at 80 Flights per Second
-
Duty Cycle should be:
- more than 30% when operating at 30 Flights per Second
- more than 95% when operating at 80 Flights per Second
-
Stability should be:
- Above 94% when operating at 30 Flights per Second
- more than 96.5% when operating at 80 Flights per Second
If you have a problem with voltage, fix that first. Check the harnessing for damage and ensure alternator is operating. If the voltage is within the expected range, but something else is off, check for obstructions or misaligned parts in SpeedTube. If the problem persists, refer to the Dealer Service Manual or contact product support.