Electromagnetic (EM) FlowSense Setup
Find important steps to set up Electromagnetic (EM) FlowSense.
Updated March 15, 2021
Electromagnetic (EM) FlowSense Setup
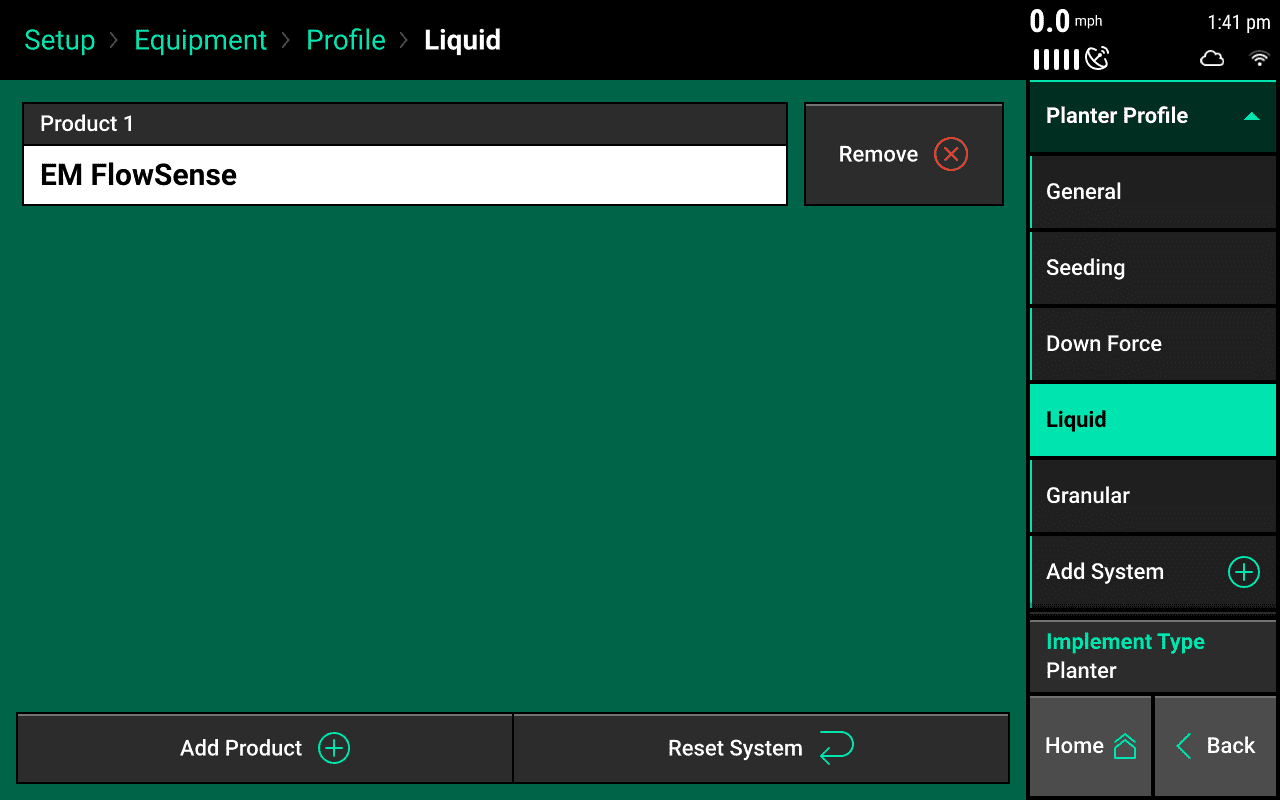
Add Hardware
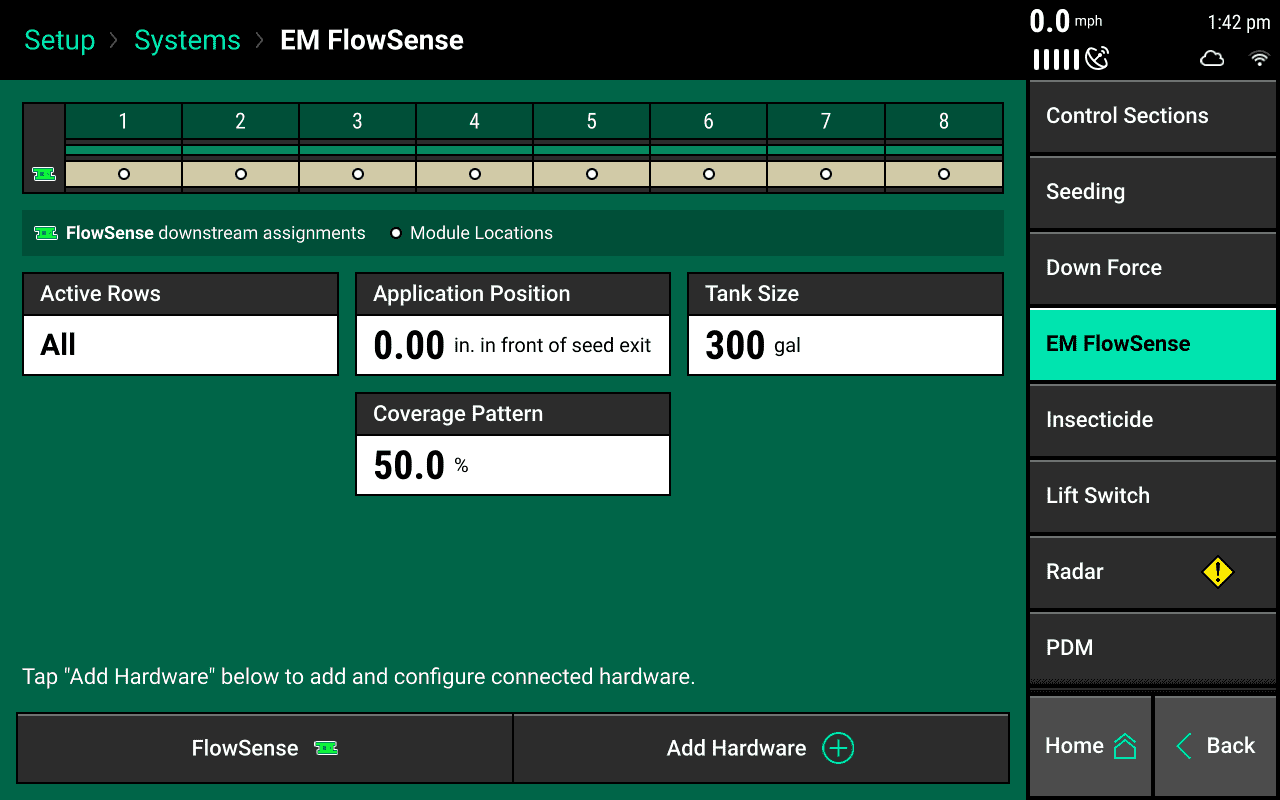
Once the Liquid System has been added to the Equipment Profile, a Product Nickname tab will appear on the Systems tab. Go to Setup > Systems > Product Nickname to configure Electromagnetic (EM) FlowSense.
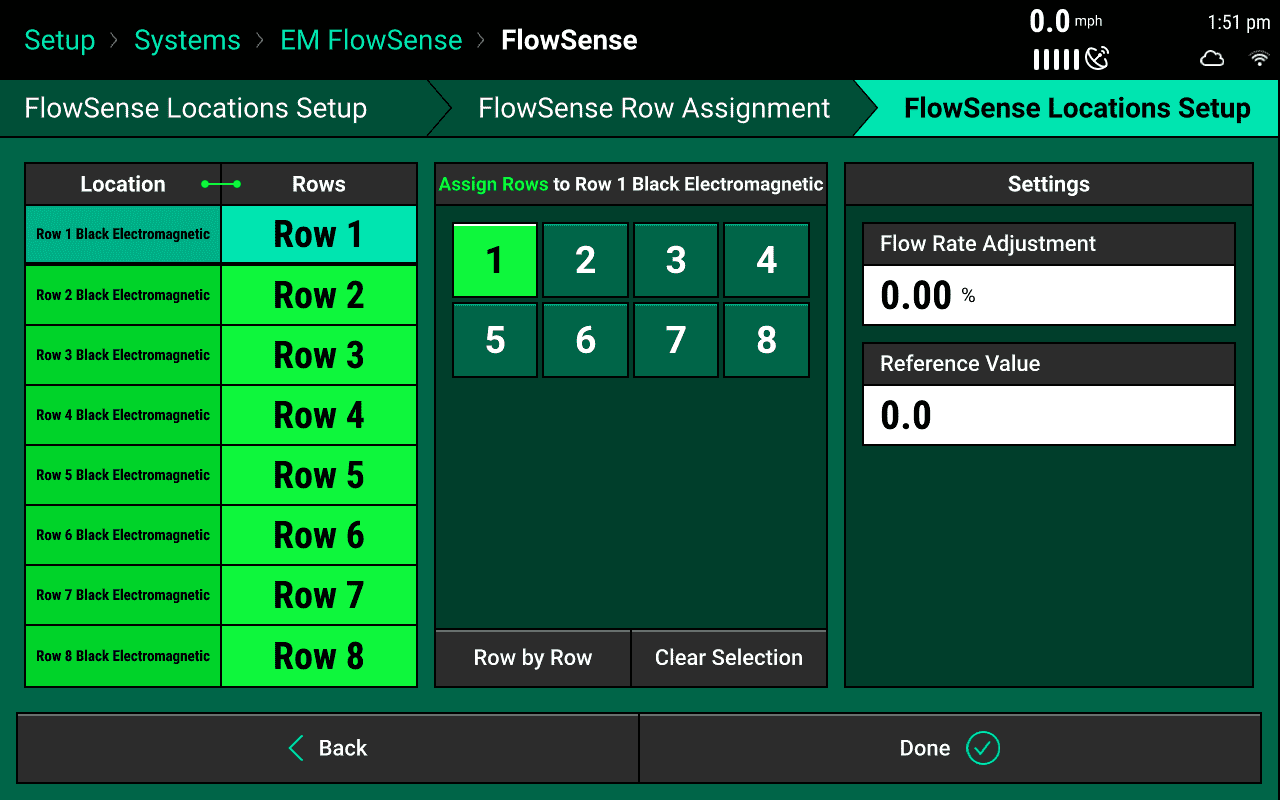
Use the ‘Add Hardware’ button at the bottom of this page to assign which rows have Electromagnetic (EM) FlowSense installed. On step 2 of the FlowSense Row Assignment page, select the correct jumper color for the specific Electromagnetic (EM) FlowSense being setup.
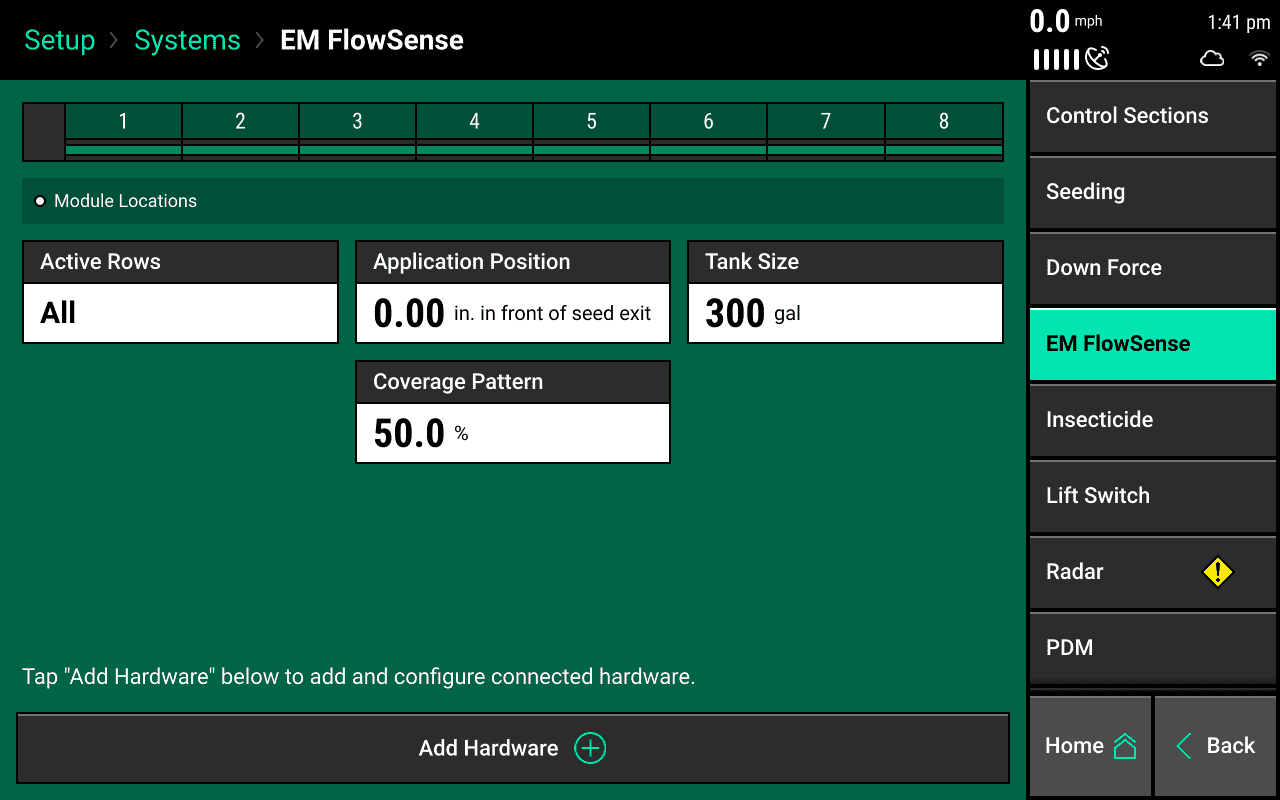
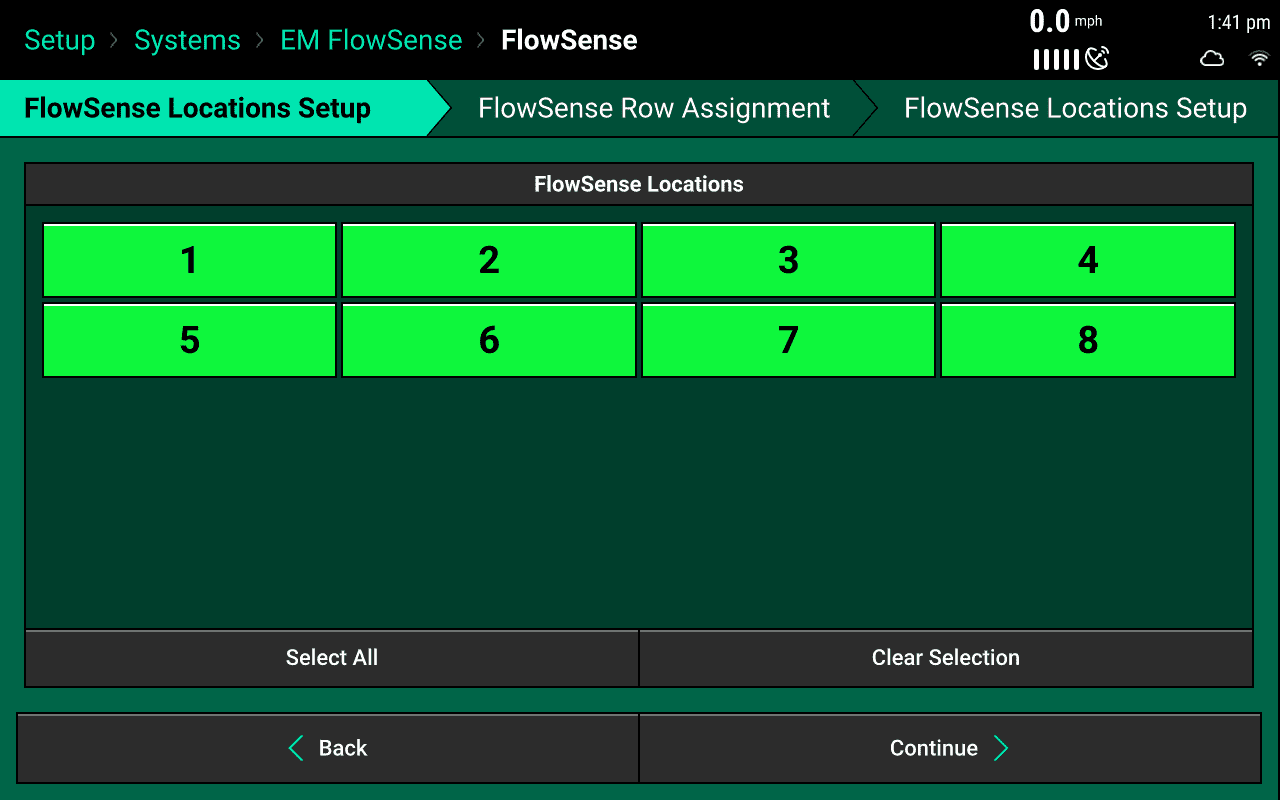
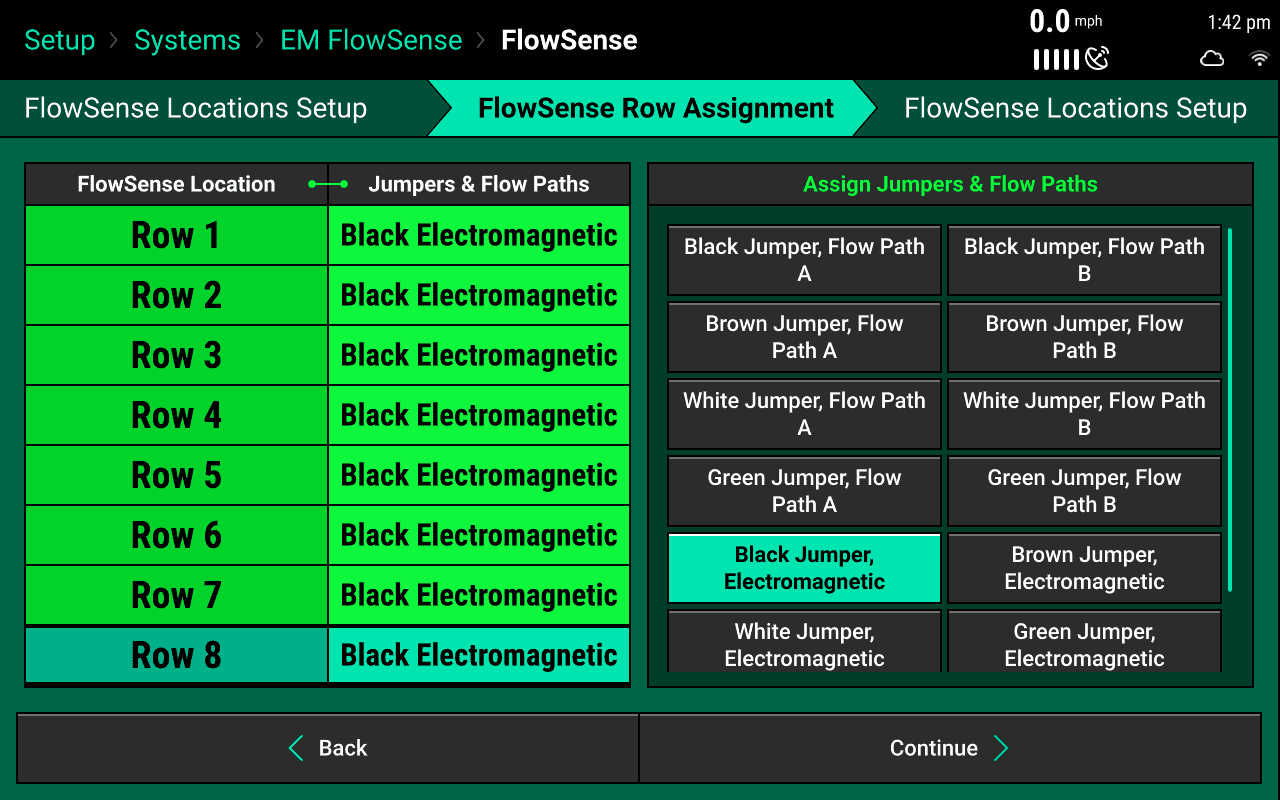
Electromagnetic (EM) FlowSense Systems Page
After the Electromagnetic (EM) FlowSense has been setup, the following buttons should be configured if needed:
Active Rows is used to define the rows that will actively be applying liquid.
Application Position is used to define the location where liquid is being applied
Tank Size is the size of the liquid tank on the tool bar. This is also used in Tank Mix setup
Coverage Pattern is used to show how the map layer is shown when entering and leaving already applied areas.

Electromagnetic (EM) FlowSense Reference Value
The Electromagnetic (EM) FlowSense device requires a zeroing procedure be performed any time the liquid product is changed from one product to another. This could be a different product or a different tank mix. To zero the Electromagnetic (EM) FlowSense device navigate to Setup > Diagnose > (Product Name). Once the zero process is complete, if the setting needs to be manually changed per row it can be done on the third step of the Electromagnetic (EM) FlowSense setup page by clicking on the 'Reference Value' button. Click here to learn more about Electromagnetic (EM) FlowSense Zero Process
Electromagnetic (EM) FlowSense Flow Rate Adjust
The measured output of the FlowSense module can be adjusted by a positive or negative percentage, up to +40% and down to -40%. This is to account for product that is a different viscosity than the average that the FlowSense module is calibrated for. Generally a timed catch test should be performed prior to inputting a Flow Rate Adjustment. Each component of the system has an individual flow rate adjustment, therefore select each row to input the flow rate adjustment for that row. This setting is found on the thrid step of the Electromagnetic (EM) FlowSense setup page.
