Configuring Monitor for vDrive
Learn monitor configuration and control sections information.
Updated June 15, 2020
Four steps to configure monitor
Navigate through four steps for monitor configuration for vDrive.
Step 1: Set drive type
Navigate to the planter setup page: select setup and then equipment. Set vDrive as the drive type.
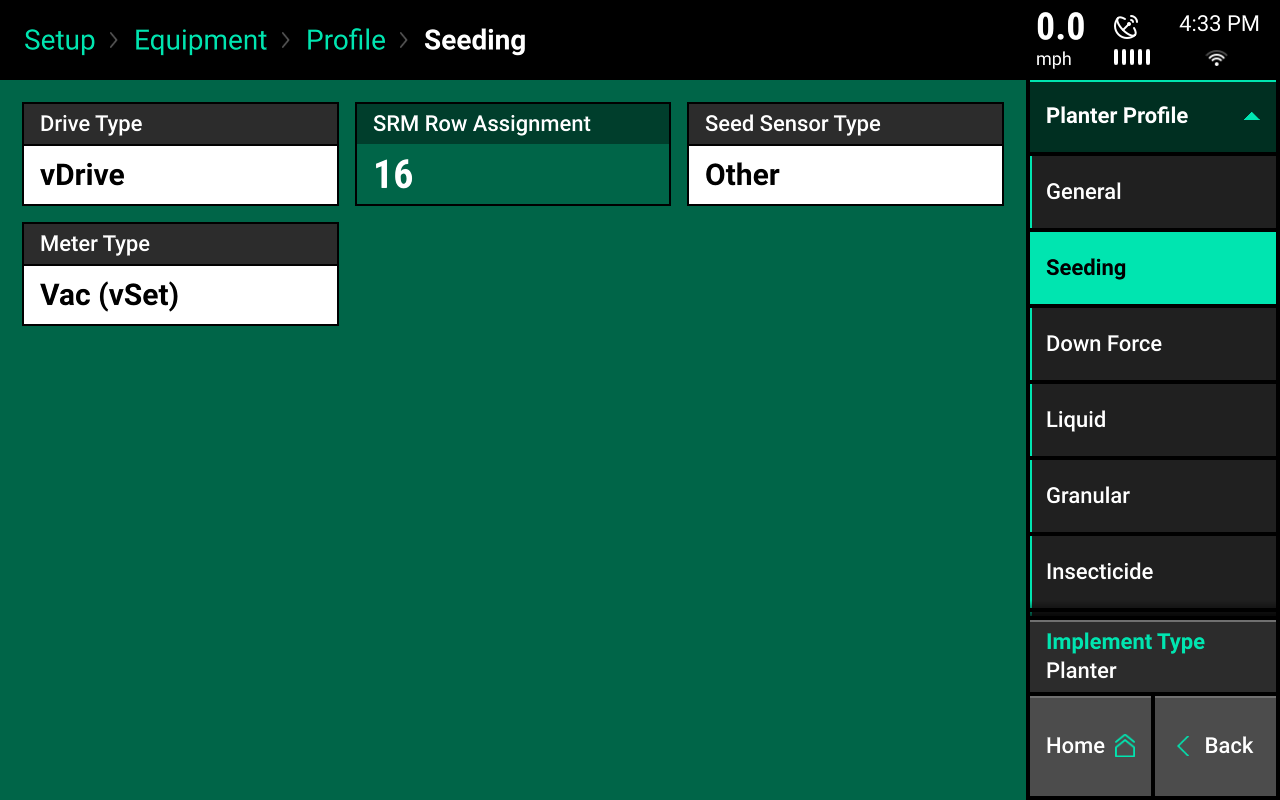
Step 2: Seeding tab
Select the seeding tab under planter profile.
On 2020.0.x and older software, drive type will be available under the main planter profile.

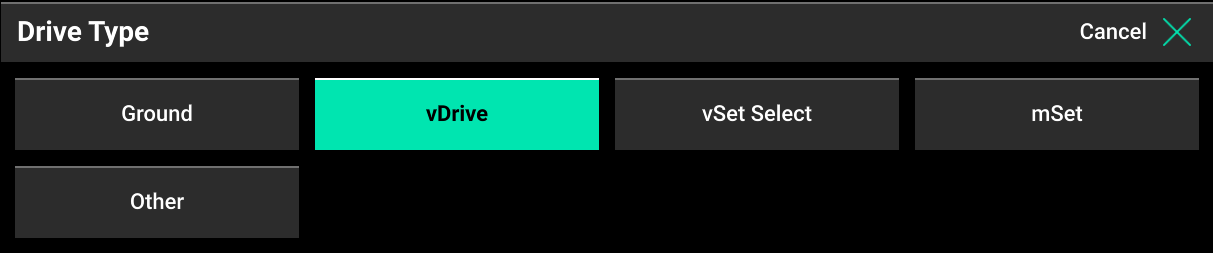
Step 3: Drive type
Press on the drive type button and then select vDrive.
If the monitor is not connected to a planter or if it is not communicating with any vDrive motors, vDrive will be yellow after selecting it. This indicates the monitor is not able to communicate with any vDrives.
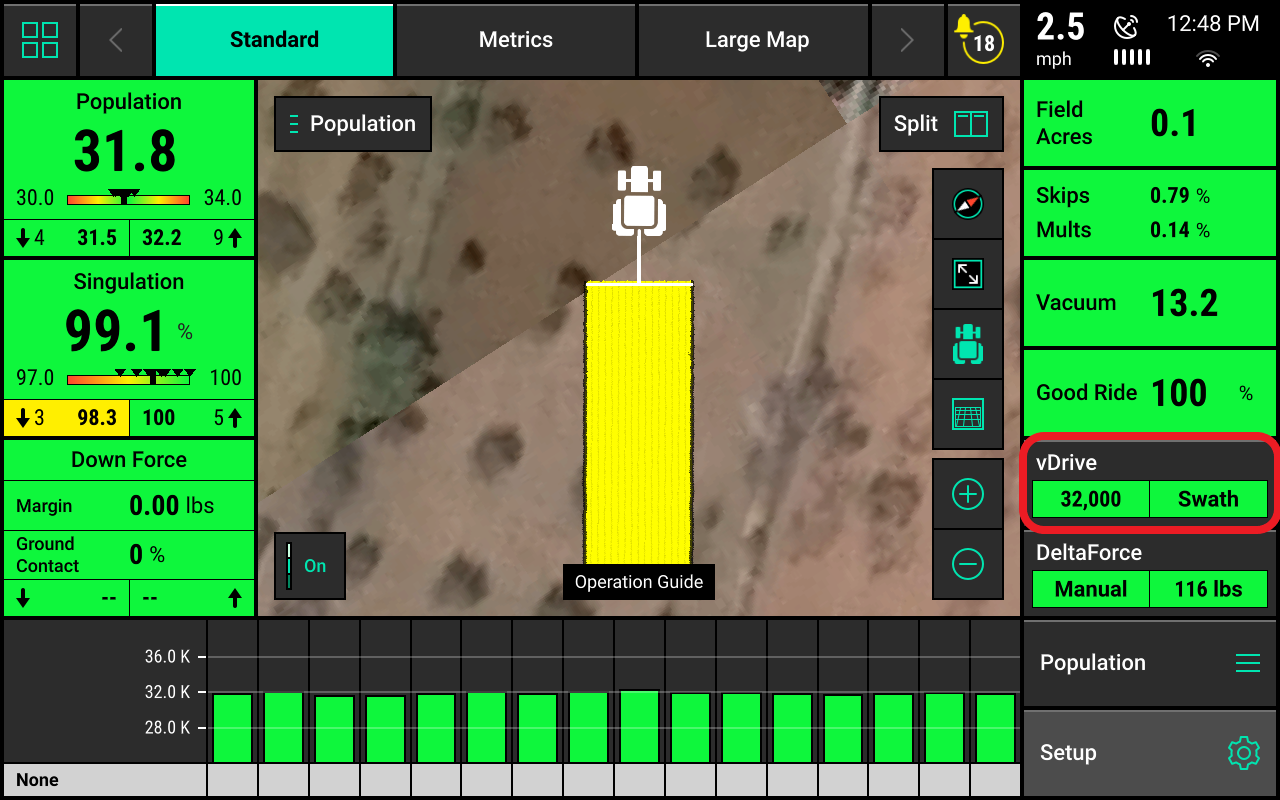
Step 4: Access vDrive control page
On the home screen, the vDrive control button will appear on the right-hand side of the screen in the standard and metrics tabs. It will display:
- Population information
- Swath information
Use this button to access the vDrive control page.
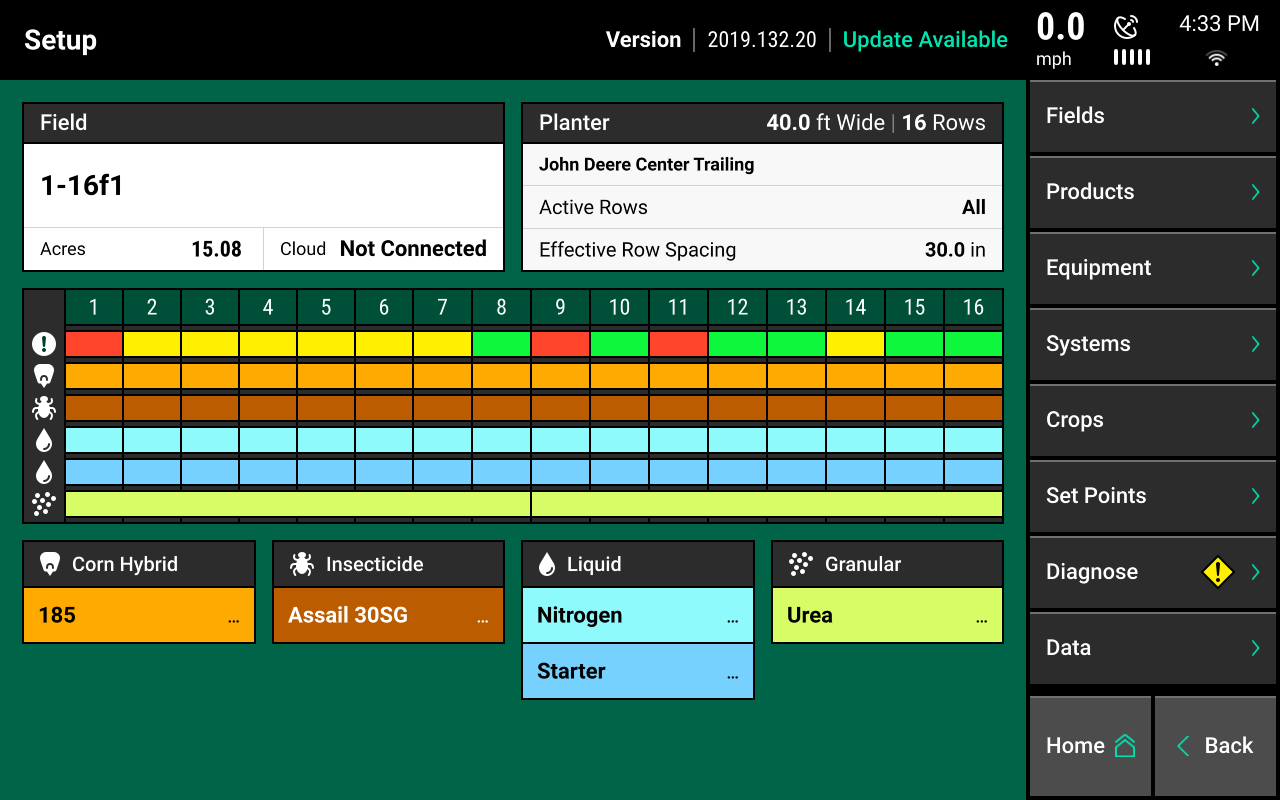
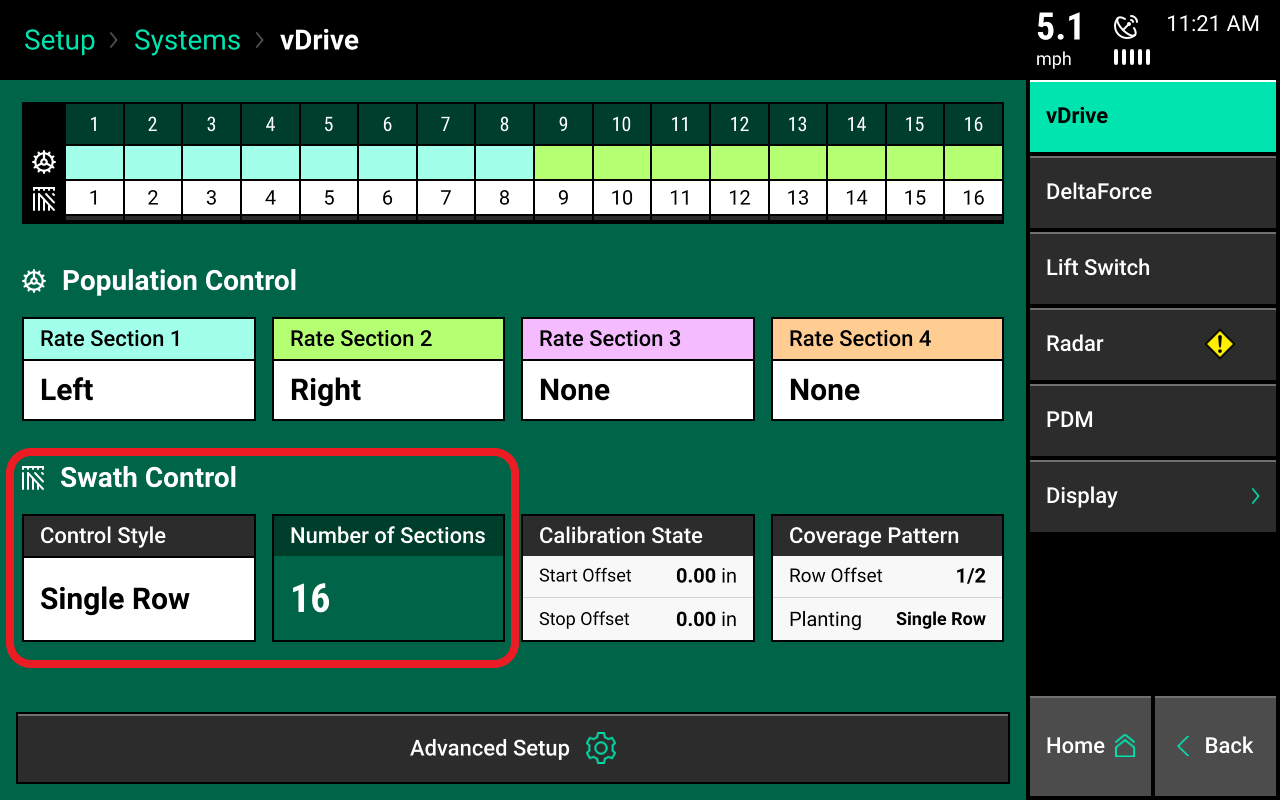
Control sections setup
Navigate to setup and then systems to configure the control sections of this implement. The control sections will apply to all rate control products configured on the monitor. This includes:
- Seeding control
- Liquid fertilizer control
- Granular fertilizer control
This section only applies to 2020.1.x and newer software.
Rate section setup
Set up the rate control. Rate control setup allows the operator to choose which rows to set to certain rates. Control up to four different rate sections at once.
Rate sections can:
- Be assigned a different target rate
- Be assigned a different prescription attribute
- Be any combination of rows
Any rows not assigned to a rate section will not operate or pass health checks.
If all rows will be controlled with the same rate or same prescription attribute, only one rate section needs to be configured.
If only one rate section will be used, select rate section 1 and then select all.
Controlling different rates between rows or sections? Use multiple rate sections.

Set up rate section
Select one of the four rate sections. Then, assign appropriate rows to the rate section. Rate section rows include:
- Odd
- Even
- Left
- Right
- List
When selecting list, define which rows to use by touching those row numbers. They will turn green.
Ensure all rows are assigned to a rate section. Any row not assigned to a rate section will not operate.
Swath setup
Set up the swath control. This allows you to divide the planter into different swath sections.
Four different swath control options include:
- Disabled: This indicates rows with not-shut-off seeding when entering an area that is already planted.
- Single row: This means each row will shut off individually as that row enters an area that is already planted.
- Dual ends: This indicates that the outside two rows on each end of the planter are linked together. The inside rows are single row swath. This is generally used with a WAAS GPS correction.
- Custom: This is available if one of the pre-set settings is unacceptable. A custom setting can be selected; group any rows together for swath control.
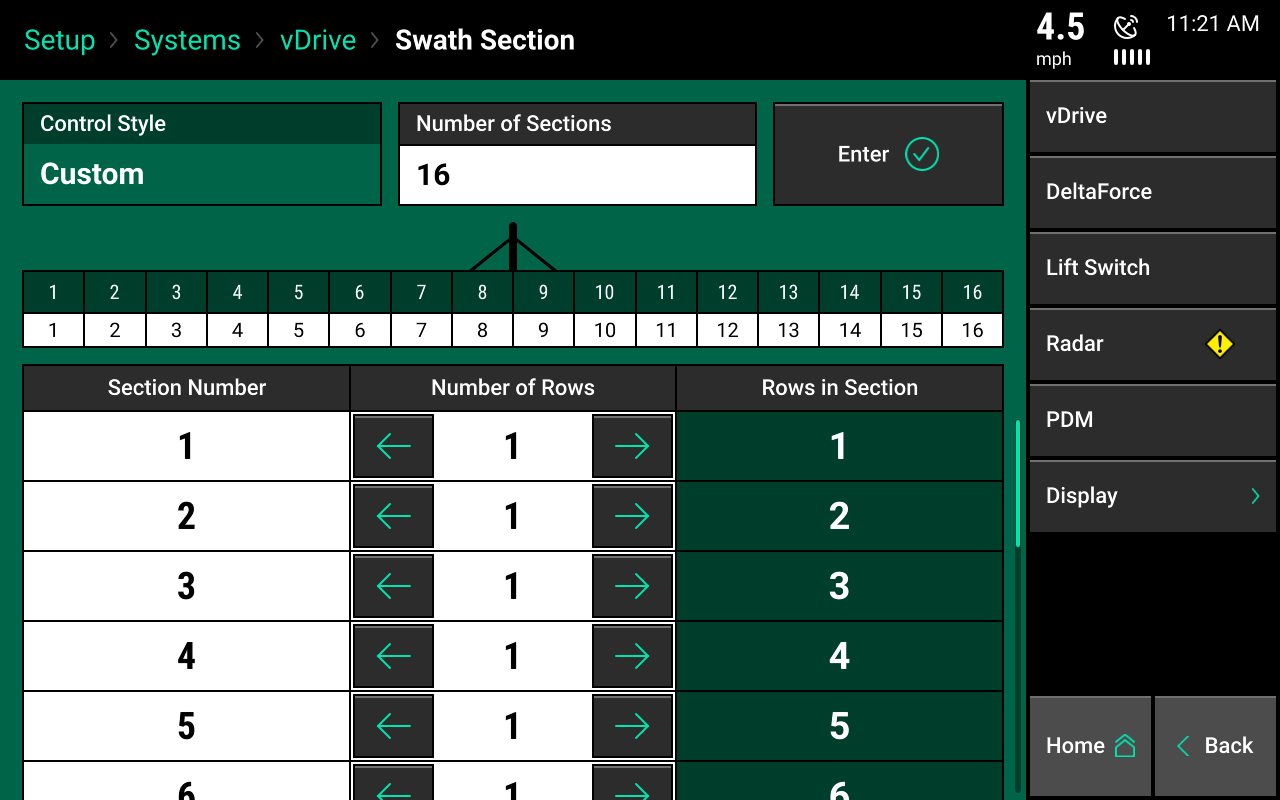
Custom swath setup
If custom swath setup is selected:
- Select the total number of sections to set up.
- For each section, select the number of rows. Press on the white box in the number of rows column and manually enter a value; or, use arrows to increase or decrease the number of rows in a section number.
- The rows in section will auto-populate as the number of rows is determined.
- If a section does not have rows assigned to it, that section number will be ignored.