vDrive Health Checks
Learn how to perform the vDrive health check.
Updated March 29, 2021
vDrive Health Check
Always perform a health check on the vDrive after installation or after it has been sitting for long periods of time. Access the vDrive health check page by selecting Setup / Diagnose / Health Check
Before running the Health Check, verify the diagnose page is communicating correctly. Click here to learn more about vDrive diagnose
Running the vDrive Health Check
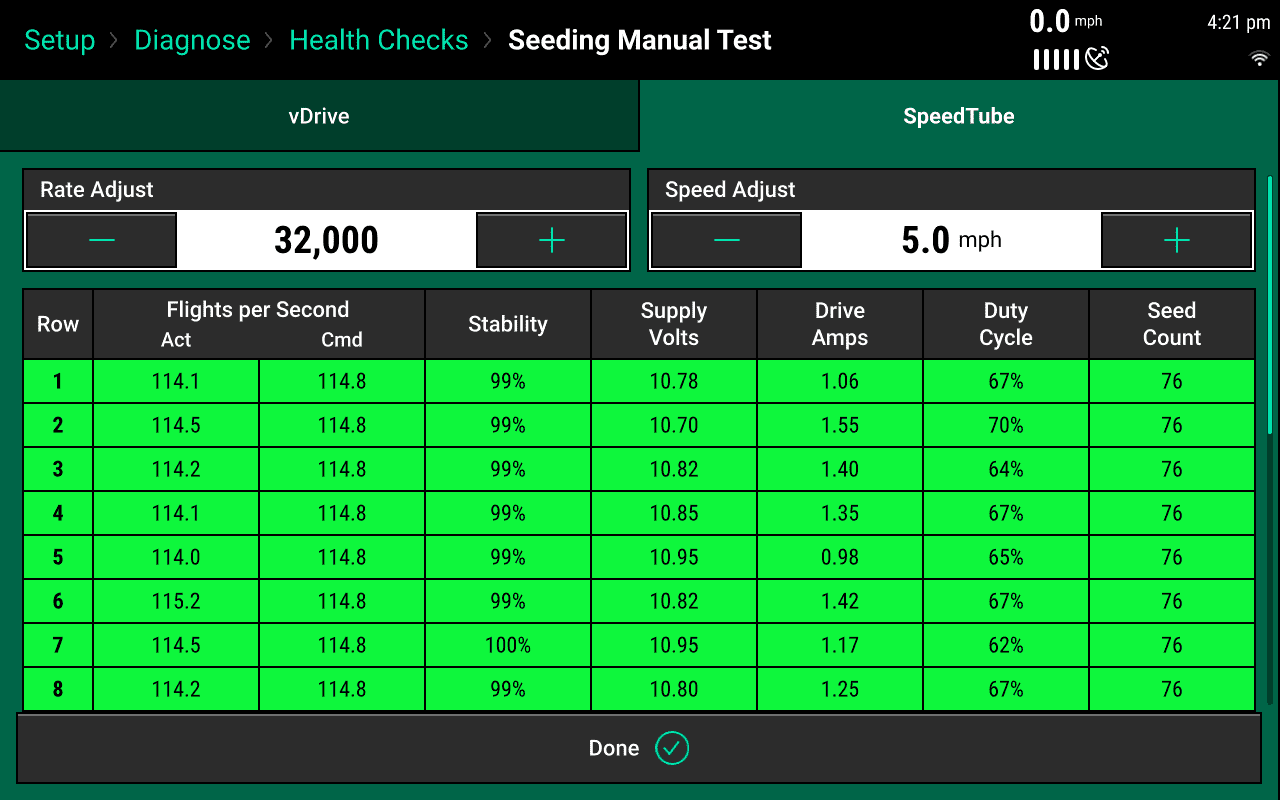
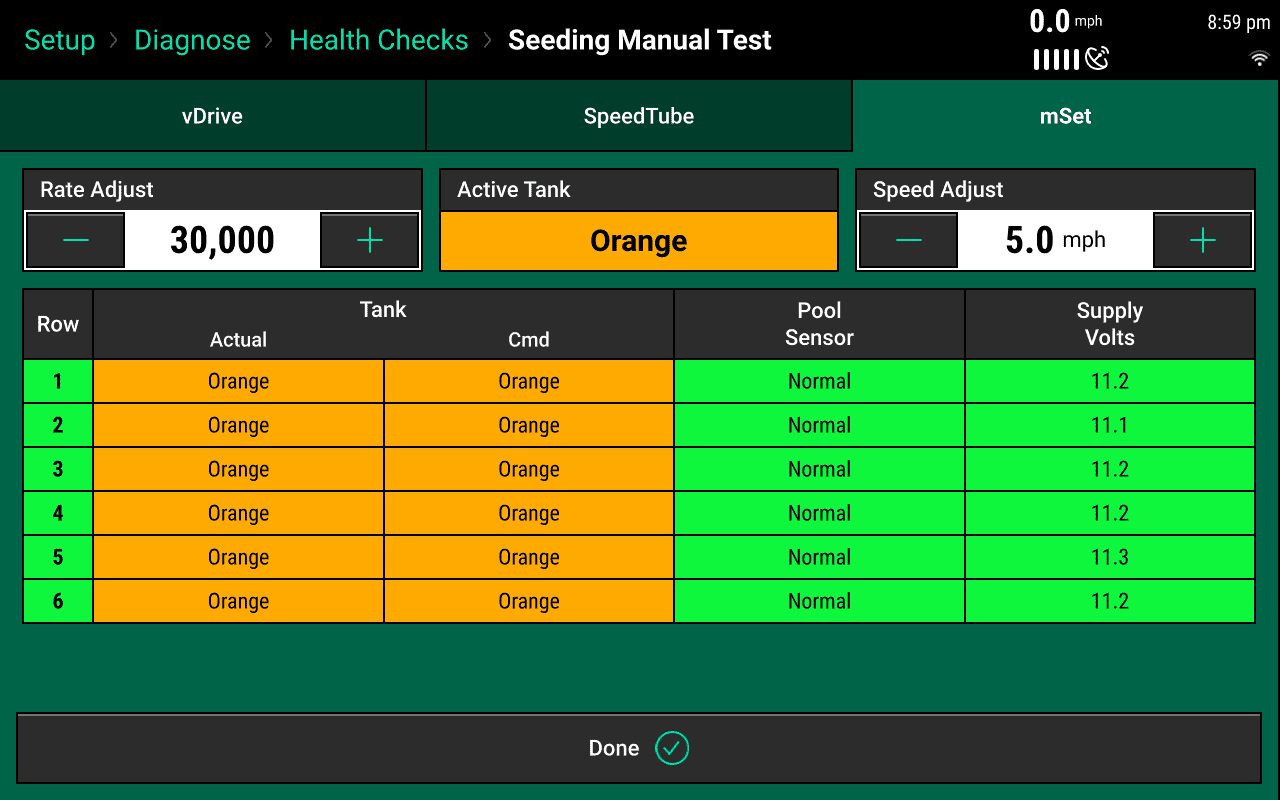
Selecting the Seeding Manual Test from the Health Check list will allow the vDrive Health Check to run. This will allow you to select a simulated Rate and Speed to verify the integrity of the vDrive System.
- Before starting the Health Check verify that the Pre-test Checklist is completed.

- Seeding Manual Test Run Screen will show the Rate Adjust and Speed Adjust and the bottom you will see each configured vDrive row. The same failed row states will appear on the rows if a vDrive has any issues.
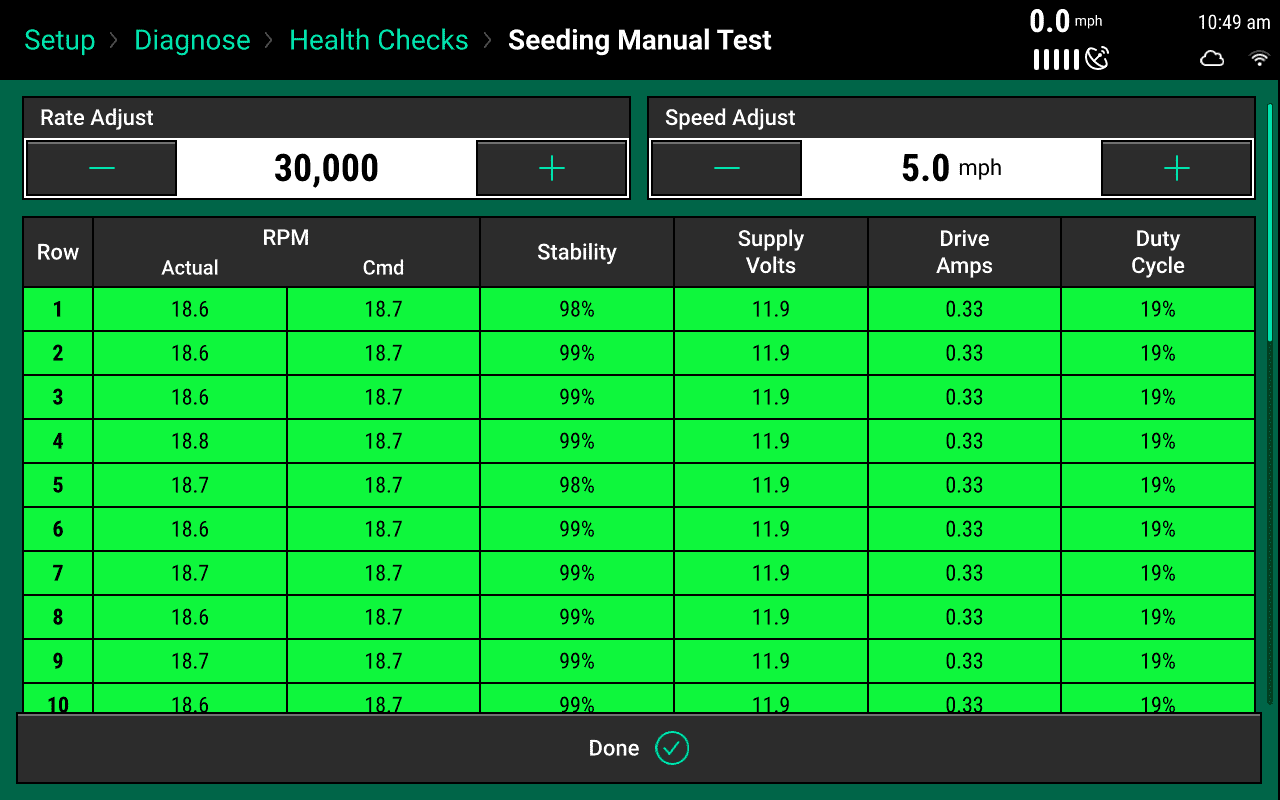
- Rate Adjust allows you to select the + or - sign to increase or decrease the seeding rate along with pressing the button to type in a manual rate.

- Seed Adjust allows you to select the + or - sign to increase or decrease the simulated vehicle speed along with pressing the button to type in a manual speed.

For assistance with diagnosing failed health checks, see the troubleshooting diagrams in the Dealer Service Manual.
vDrive Health Check Tabs
If you have mSet or SpeedTube configured you will find tabs at the top of the Seeding Manual Test page.
- Click here to learn more about the SpeedTube Health Check
- Click here to learn more about the mSet Health Check (coming soon)