Customize the Home Screen
Customize the information displayed on your 20|20 home screen by creating layouts. Within each layout, place widgets. You can save multiple layouts.
Updated June 29, 2020
Add a new layout
To add a new layout, press the Layout+ button at the top of the screen. You can create up to 8 layouts for each implement type.
Rename a layout
To rename the layout, use the Settings button at the top of the page.
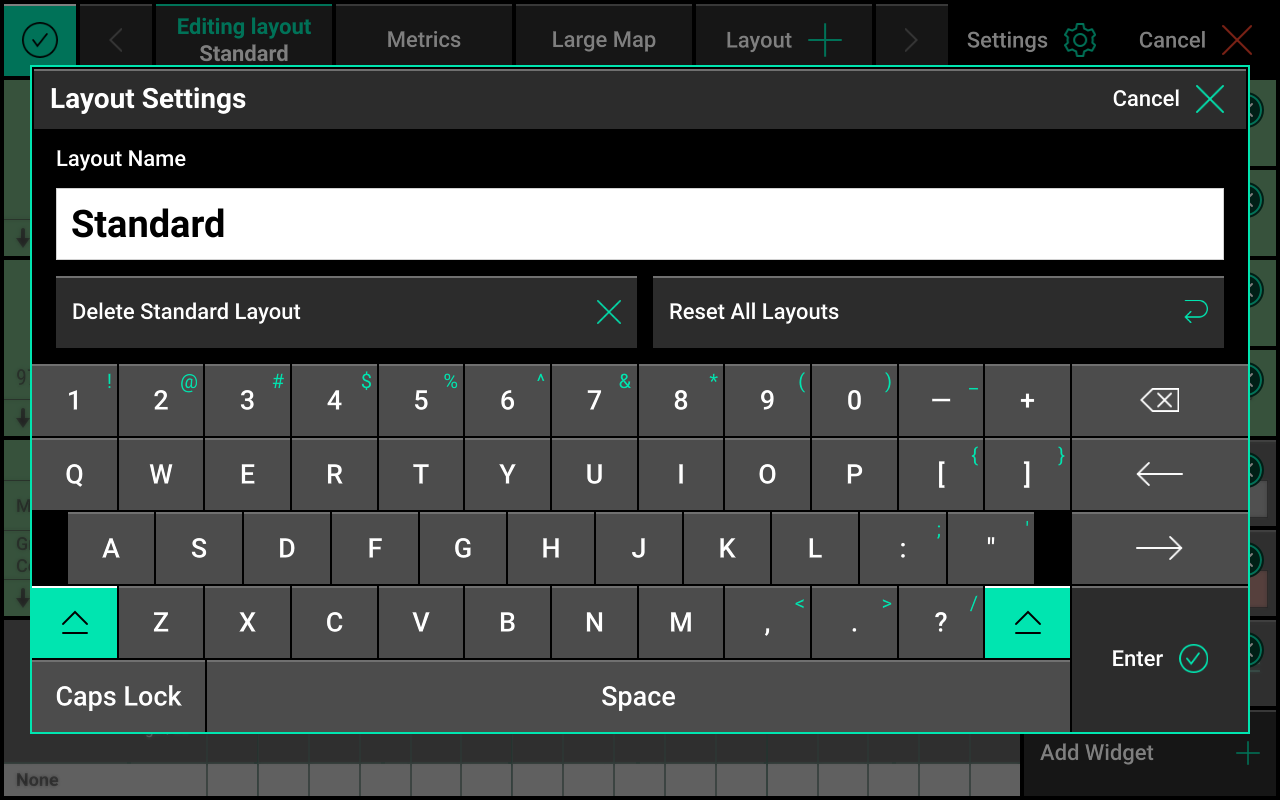
Reset all layouts to factory default
To reset all layouts to factory default, use the Settings button at the top of the page.
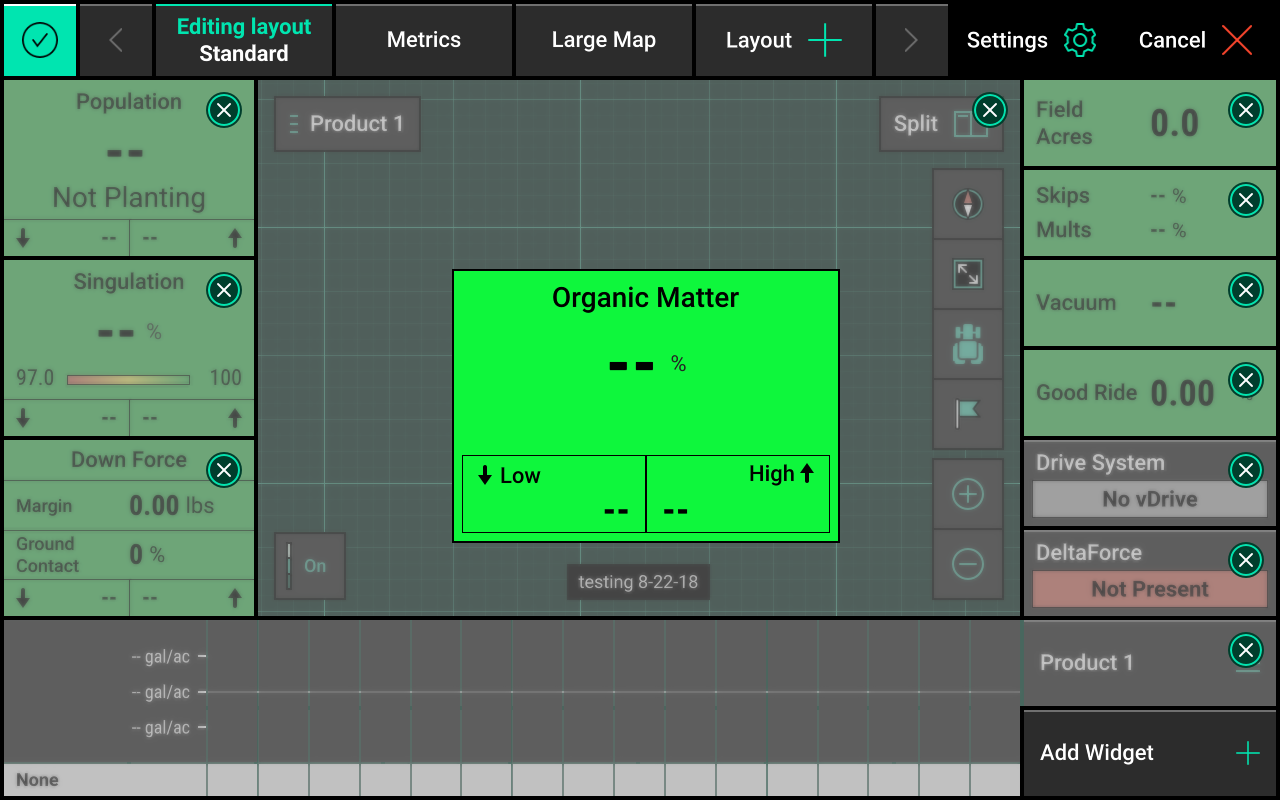
Edit a layout
Select the grid button in the top left hand corner of the screen. The home screen will dim and you will see a grid pattern overlay.
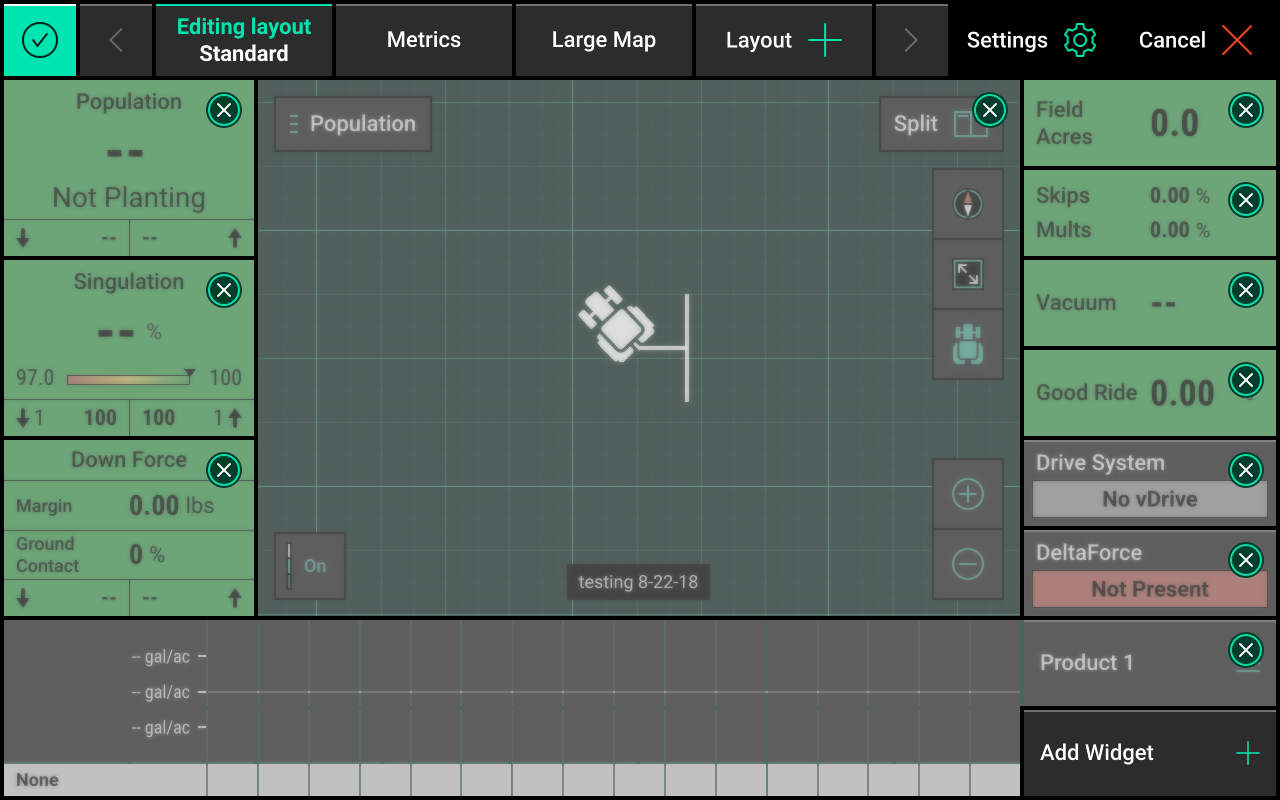
Use the grid to place widgets. Every widget takes a certain number of grid spaces. For example, a 2x2 Metric widget takes up four grid spaces (two columns and two rows).
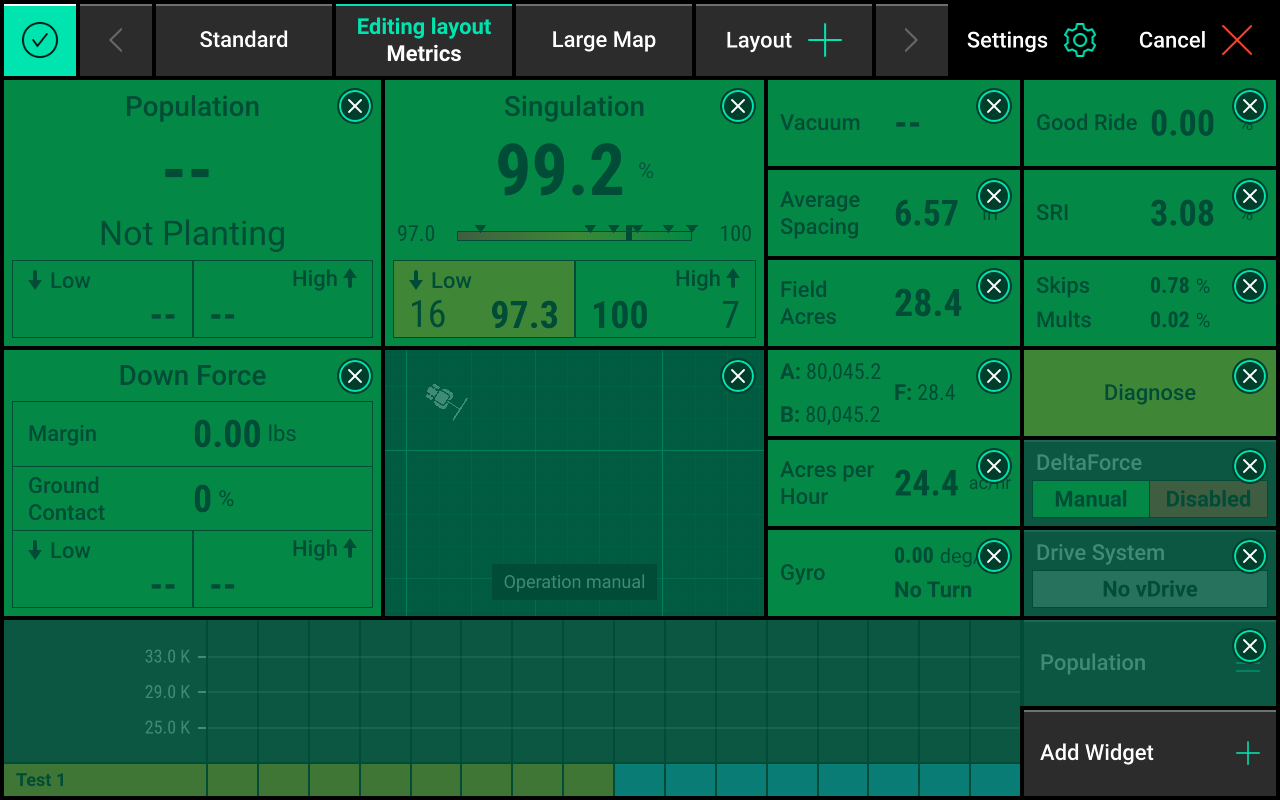
Add a widget to a layout
While the grid overlay is visible, press the Add Widget button in the bottom right corner.
Types of widgets
You can add four types of widgets to the home screen:
- Metrics
- Controls
- Dashboard MiniChart
- Map
Metrics
Metrics display planter information.
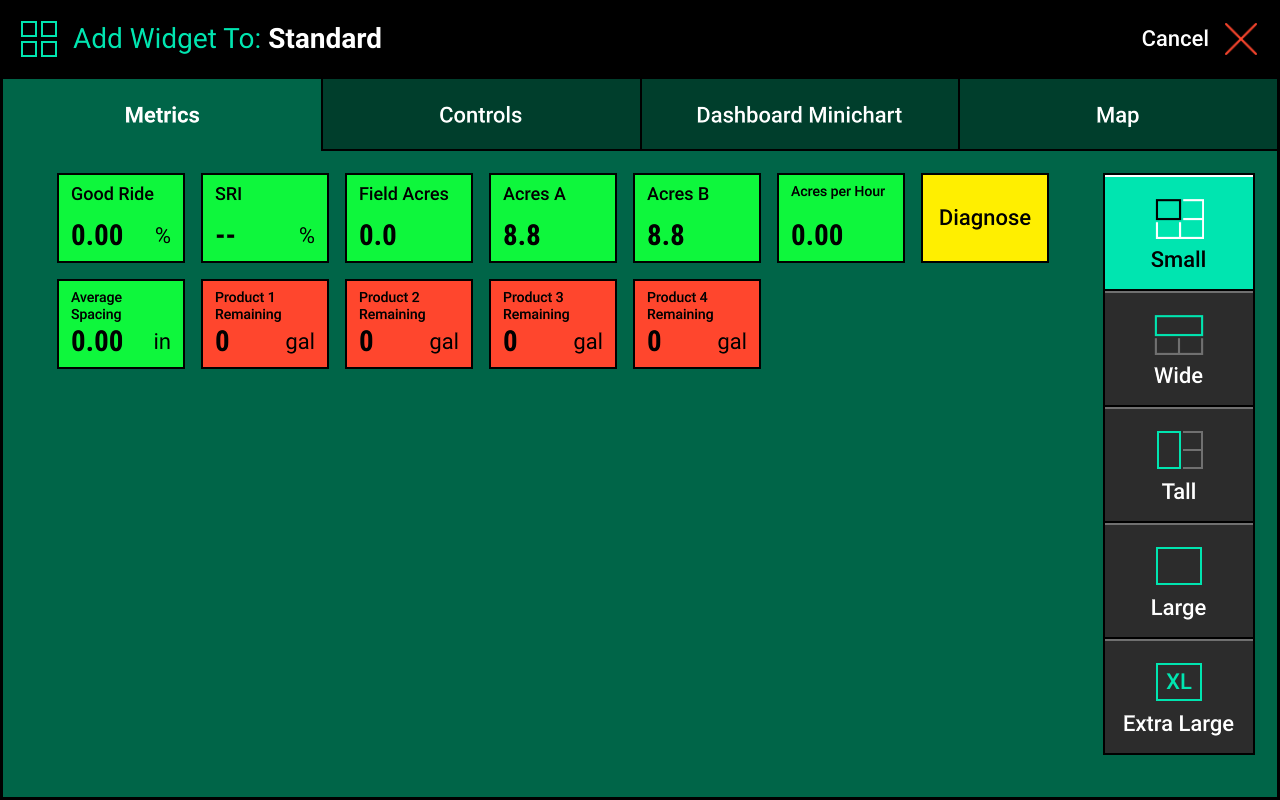
Choose from five sizes:
- Small (1x1)
- Wide (2x1)
- Tall (1x2)
- Large (2x2)
- Extra Large (3x3)
Not all metrics are available in Large and Extra Large.
Press the size buttons on the right-hand side of the screen to view the metrics available in each size.
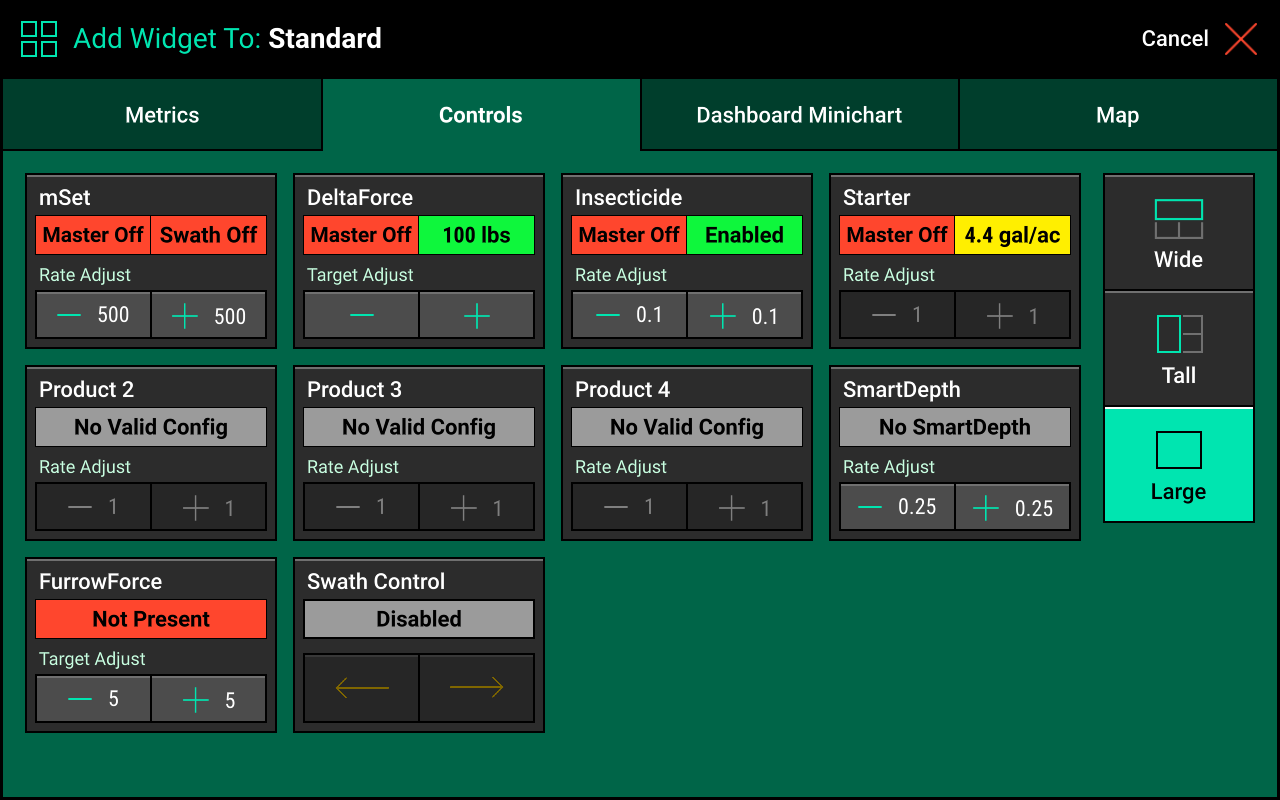
Controls
Controls control the systems installed on your planter.
By default, Control buttons for vDrive, vSet Select, and DeltaForce on the Standard and Metrics screens. You must manually add Control buttons for other systems (ex: vApplyHD).
Choose from three sizes:
- Wide (2x1)
- Tall (1x2)
- Large (2x2)

Large Control buttons also add quick adjustment features for your system. Access quick adjustment features by pressing and holding the smaller Control buttons.
Large Control buttons also add quick adjustment features for your system. Access quick adjustment features by pressing and holding the smaller Control buttons.
Large Control buttons also add quick adjustment features for your system. Access quick adjustment features by pressing and holding the smaller Control buttons.
The same control button controls both vDrive and vSet Select. The button will switch modes depending on the drive system configured in the Equipment menu. The vApplyHD and FlowSense control buttons are the same and will switch according to which system(s) are configured.
The name of the vApplyHD and FlowSense control buttons will be Product 1 and Product 2 by default. Once the liquid system(s) are configured on the monitor, the name of these control buttons will change to reflect the product Nickname(s) that are set.
The Product 2 control button will only be used if there are two liquid systems installed on the planter.
Dashboard Minichart
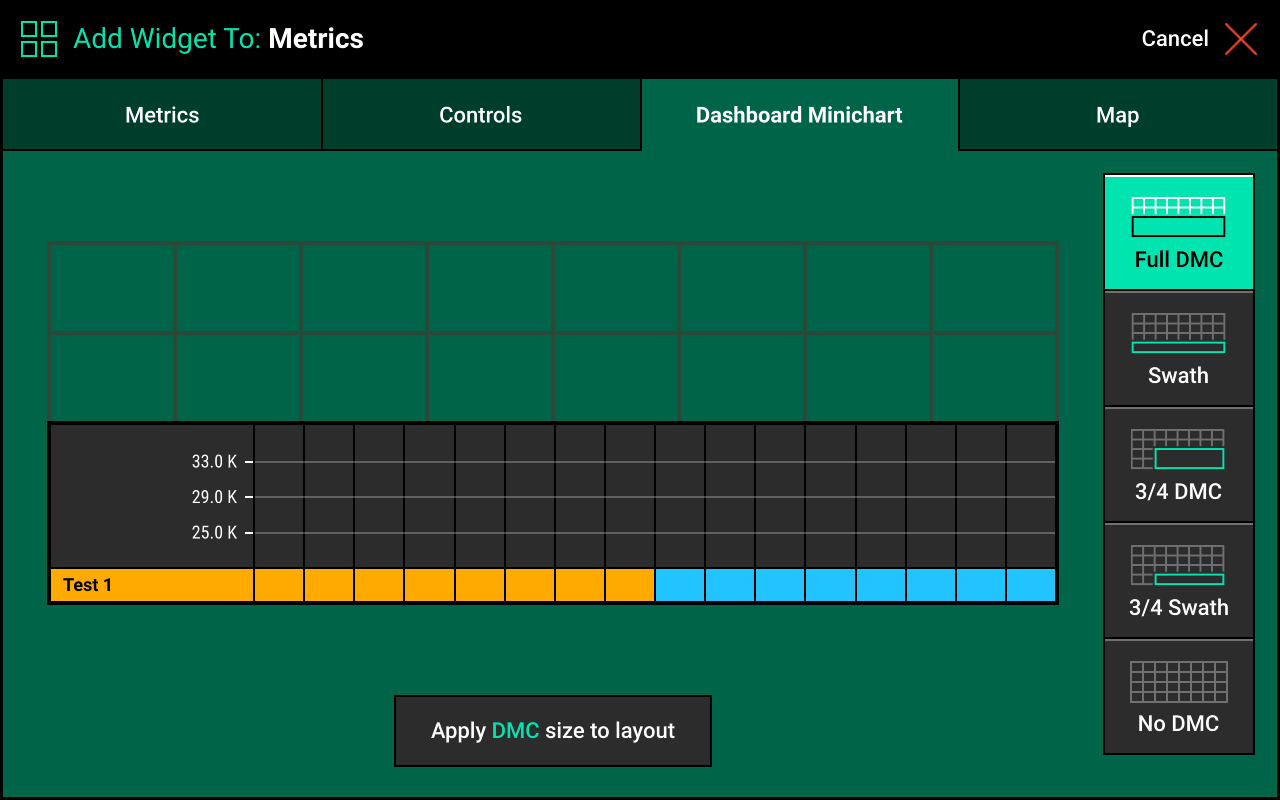
Add either a Dashboard Mini Chart or a Swath Control bar to the home screen. Choose between two sizes:
- Full (stretches across the entire bottom of the display)
- ¾ (leaves space for more buttons on the left)🇩
Remove the Dashboard Mini Chart by selecting No DMC. To apply your selection, press Apply DMC Size to Layout.
Map
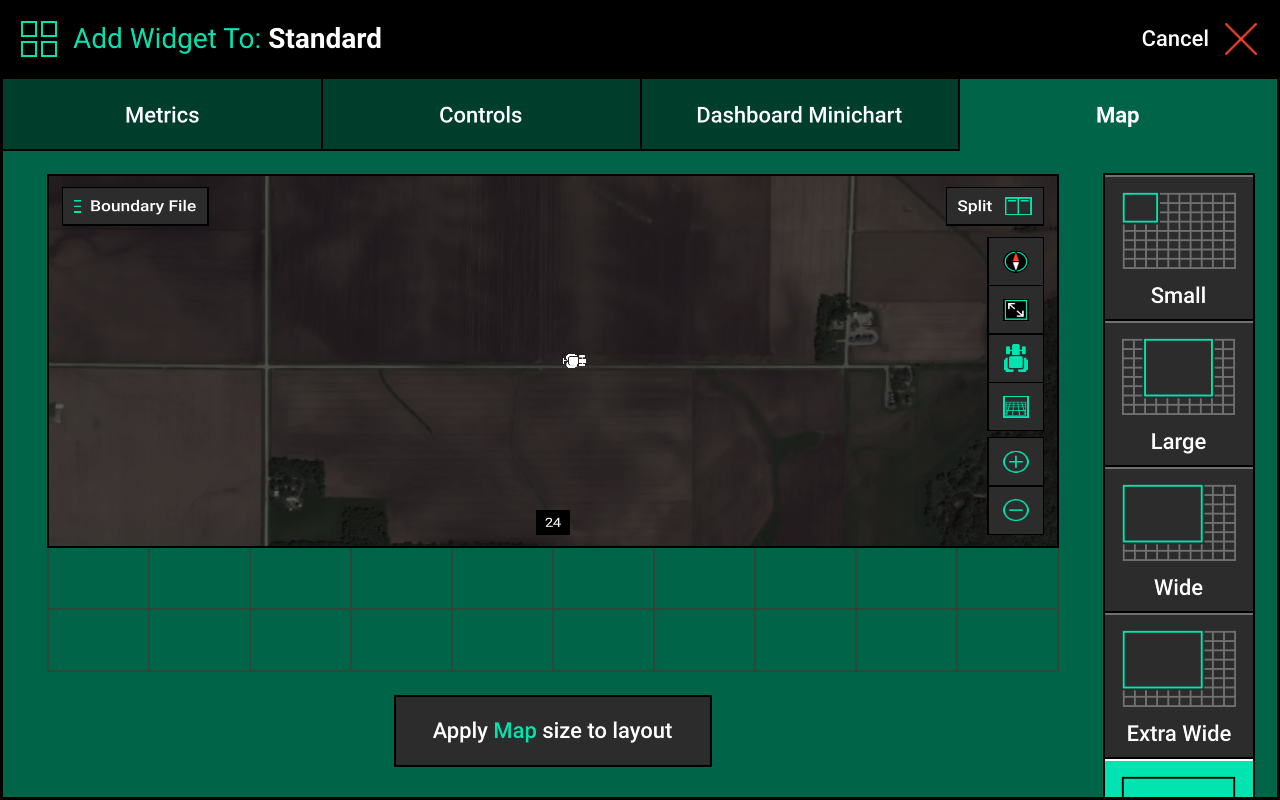
Choose from four map sizes:
- Large (6x6)
- Small (3x3)
- Wide (6x7)
- Full (7x10)
You can also choose No Map. Select the map type. Then press Apply Map Size to Layout to apply your selection.
Place a widget
After selecting a widget, you will see it appear in the center of the grid. Press and hold the widget, then drag it to the desired position.
If the widget is placed on top or on top of part of another widget, the entire widget that it was placed on top of will be removed and a blank green area will be left.
Select Add Widget to continue customizing the home screen.
Move a widget
To move a widget to a new location, press and drag it.
Remove a widget
To remove a widget, press X at the top right corner.
Save layout changes after placing/moving widgets
Press the check mark in the top left corner to save changes to your layout.
Only the layout for the selected tab at the top of the home screen will be changed.