Data Menu
Find features that assist in exporting, importing, and backing up data.
Updated June 29, 2020
Data assistance
The data menu has features that assist with:
- Exporting
- Importing
- Deleting
Backup and restore
The backup/restore option allows for backup or restore of an entire monitor or configuration in one action.
Software updates
Complete software updates through the data menu with a USB drive.
Export and import
Information is exported and imported through the USB slot on the left-hand side of the display.
Import files on the data menu
Select the import button on the navigation pane to import files onto the display.
Files to import into a display must be in either:
- A folder that was exported directly from another display
- Or a folder that was placed directly onto the root directory on the USB drive
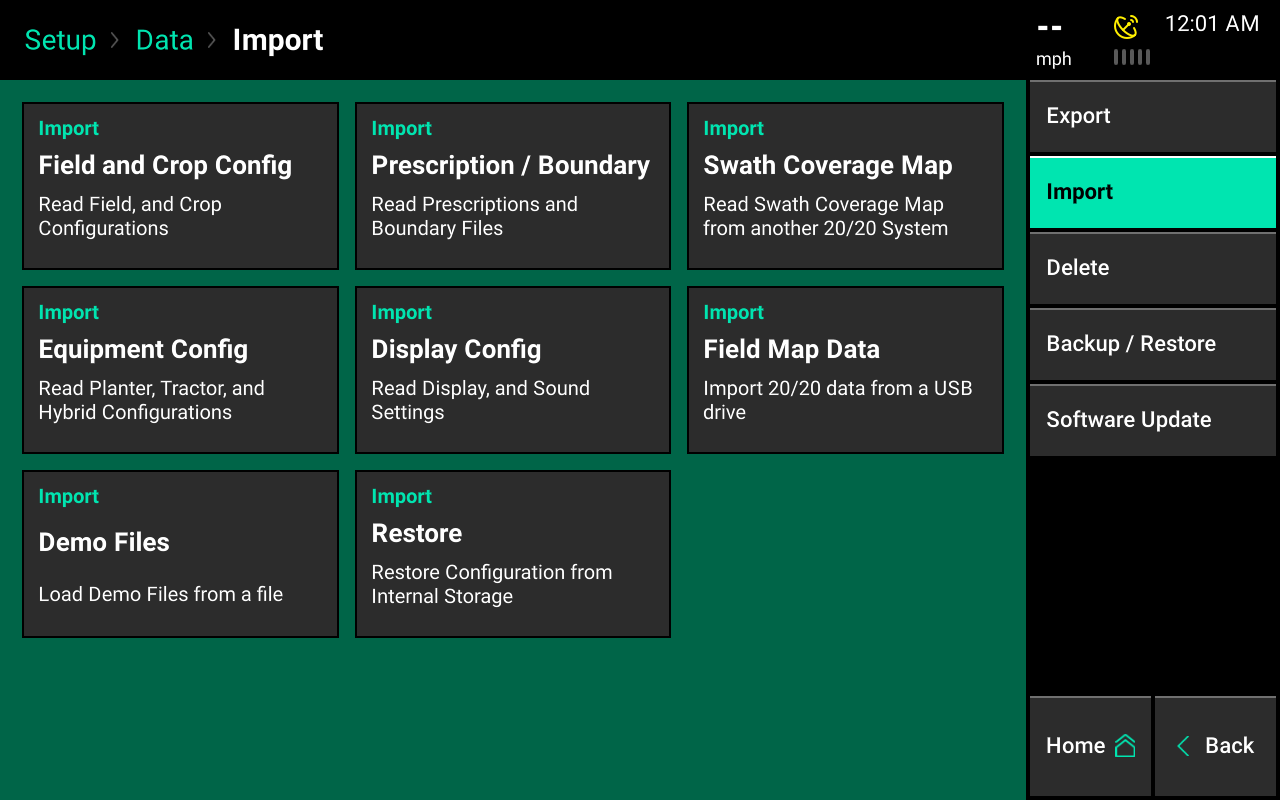
Field and crop configuration
Import client, farm, and field names as well as the crop and hybrid configurations from another 20|20 or a Generation 1 & 2 20/20 SeedSense monitor
Prescription/Boundary
This imports prescription and boundary files from a USB drive. Files must be in shape files and include file extensions:
- .shp
- .shx
- .dbf
Swath coverage maps
Import a swath coverage map from another implement, currently running in the same field. This allows the system that is importing the file to swath off in the areas of the field planted, applied, or harvested by the other implement.
Equipment config
Import configuration files to change the active implement (e.g. planter, tractor, combine, or seeder).
Settings that can be imported:
- Population
- Liquid
- Insecticide
Display config
Import a display configuration to change the home screen layouts as well as other settings that can be adjusted on display pages under setup systems.
Field map data
Import field data onto the display to view maps and field information from previously exported data or from other Gen 3 20|20 displays.
Demo files
Import demonstration files into the monitor that will run when the monitor is in demo mode. See advanced settings for more information on demo mode.
Restore
Restore monitor configurations are automatically backed up and saved by date. Select a date to restore the configuration settings that were saved on that date.
Export files on the data menu
Export files on the data menu.
Field and crop config
Through this area, export all to USB:
- Field names
- Crop settings
- Seeding settings
- Liquid settings
- Insecticide settings
Steps to configuration
- Select "Field and Crop Config."
- Then, enter a name for the configuration.
- This data can be imported back into a display.
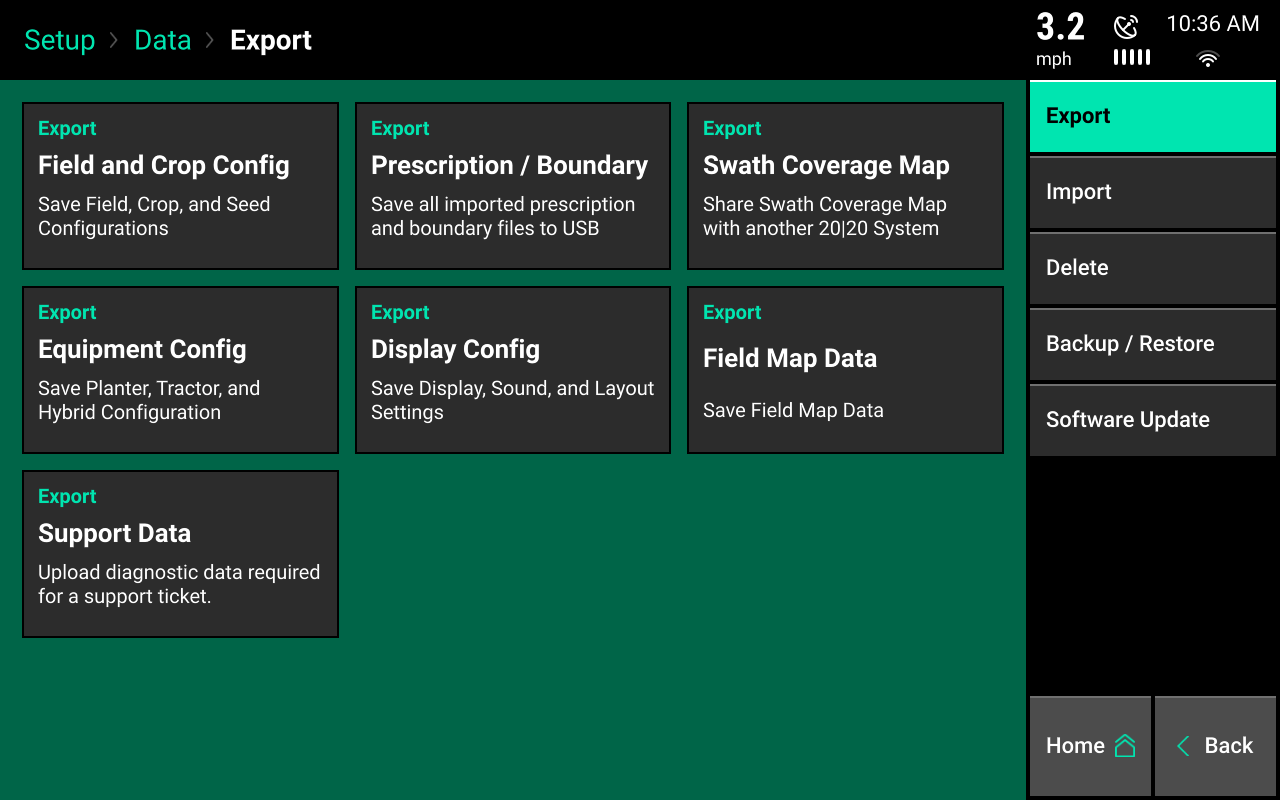
Prescription/Boundary
This exports all prescription and boundary shapes files to a USB drive that has previously been imported into the monitor.
Swath coverage map
Export to a USB drive the active field's swath coverage map. This map can then be imported into another display so that the second implement swaths off to the original implement's coverage map.
Equipment config
Export the following to a USB drive:
- Active implement type (like planter, combine, or seeder)
- Seeding settings
- Liquid settings
- Insecticide settings
After selecting "Equipment Config," enter a name for the configuration. This data can be imported back into a display.
Display config
This exports all the display, sound, and layout settings to a USB drive. After selecting "System Config," enter a name for the configuration. This data can be imported back into a display.
If dual displays are being used, only the display config for the display that the USB is connected to will export. Each display will have its own config.
Support data
This uploads field map data and diagnostic logs to Precision Planting Product Support.
This requires WiFi connectivity prior to uploading.
Field map data
This displays a list of all data for all implement types.
Data is organized by:
- Name
- Data size
- Acres
- Season
- Pass
Only fields that have data will be displayed. Select the column header to reorganize the list. Use the "Search Fields" button on the navigation pane to search for a specific field name.
Data can be filtered by season or by the type of field pass at the top of the screen.
Transfer all fields
This exports all data for all fields to a USB drive. To export specific fields, select the fields to export by pressing on them (selected fields will be highlighted) and then press the "Transfer Selected Fields" button.
Backup and restore files
This backs up all data and configuration files on the monitor to a USB drive.
The files saved on the USB drive can then be used to restore:
- Just the configurations
- An entire system by bringing back all the data and configurations to a monitor
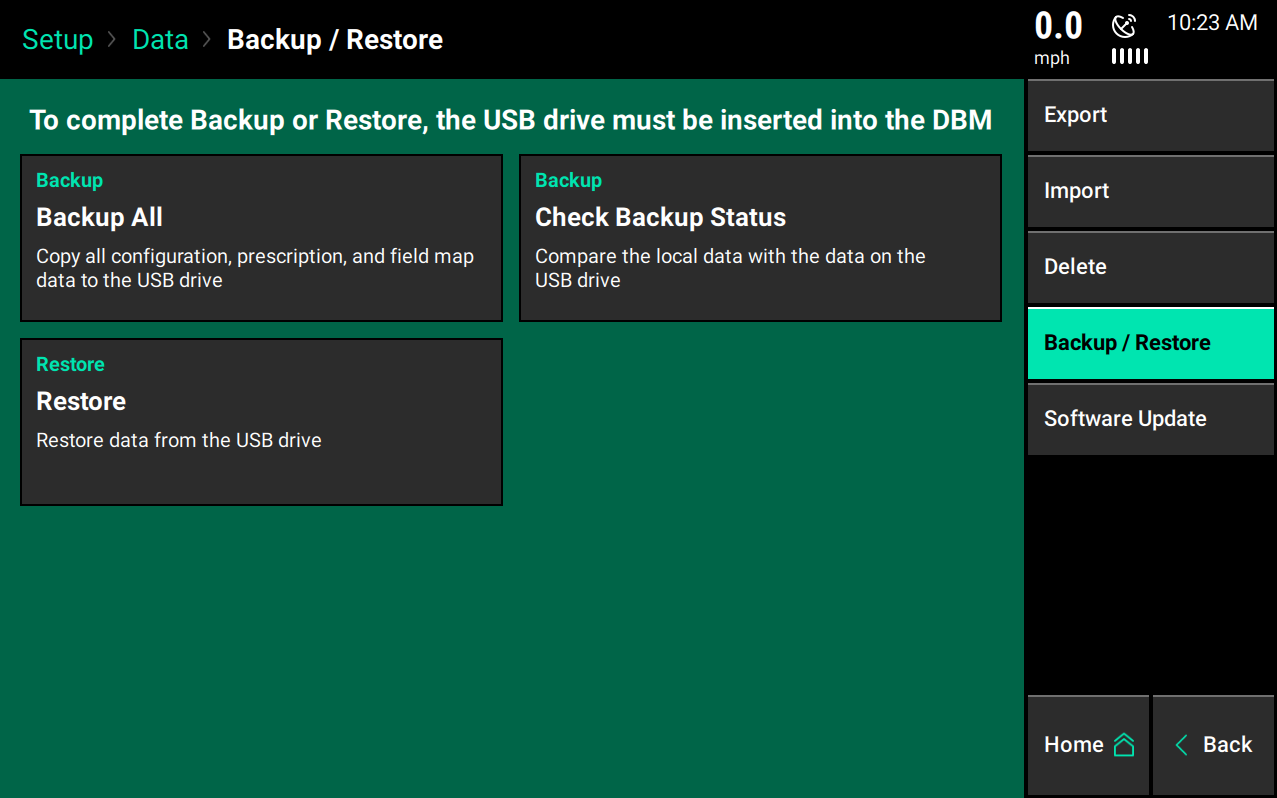
Backup all
This copies all configurations, data, and imported files from the monitor to a USB drive. Place the USB drive into the USB port on the display base module.
Make sure the USB drive is large enough to handle an entire backup. The internal memory in the display base module is 32 gig.
Check backup status
This compares the data on a USB stick with the data on the hard drive to determine if the monitor is completely backed up. This will also display the date the last backup was done.
Restore config
Select "Restore" to put files back onto a 20|20 had been previously backed up to a USB drive from either the same or different 20|20. Then, all backed up files on the USB drive will display.
Restore all
This restores everything that had been backed up, including:
- Field data
- Prescriptions/boundaries
- All settings
This makes a duplicate 20|20 of the one that had been previously backed up.
Restore config
This restores just the configurations to the 20|20, including:
- Equipment configurations
- Display configurations
- Field and crop configurations
Delete files
Select the "Delete" button on the navigation tab to delete data from the display.
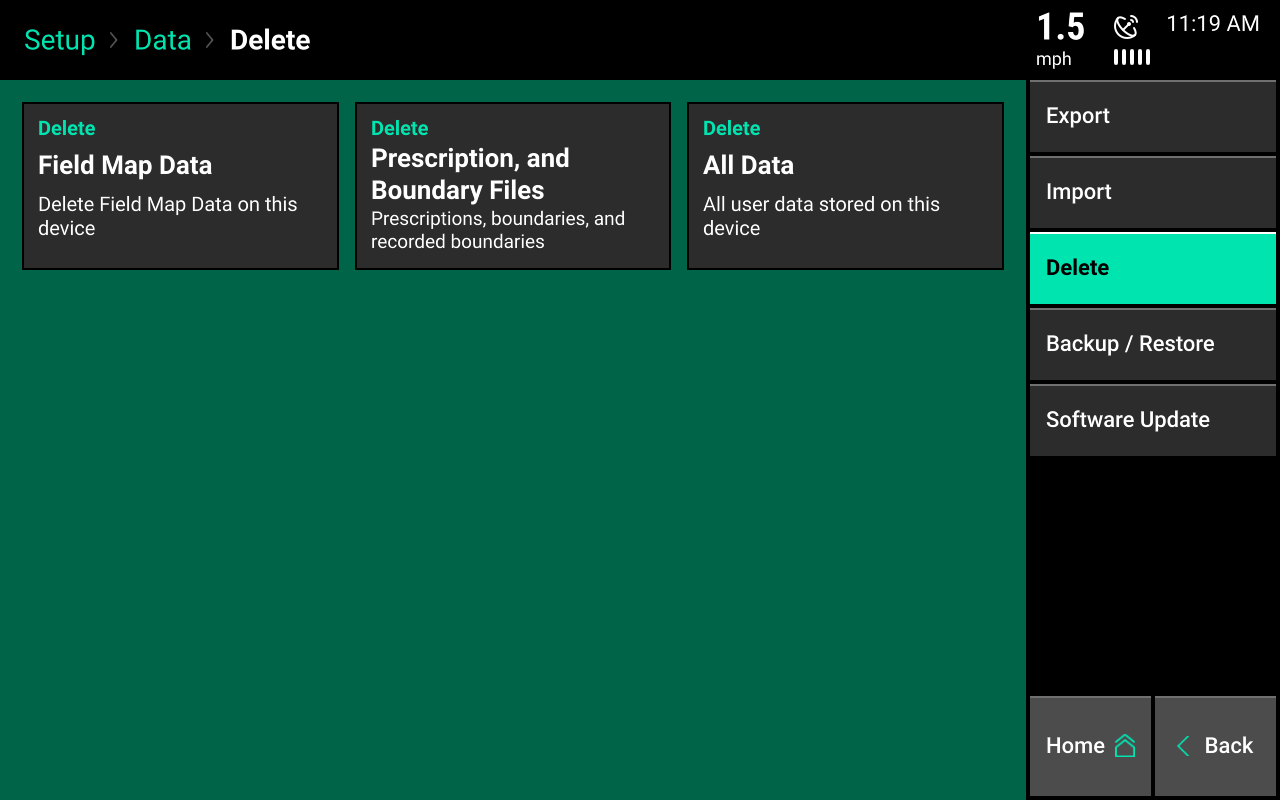
Field map data
This displays a list of fields that have data.
Data can be filtered by:
- Season
- Type of field pass at the top of the screen
Select an individual field, multiple fields, or all fields to delete the data.
This does not delete the client, farm, or field name for the field.
Prescription and boundary files
This displays a list of all shape files imported into the display and recorded on the 20|20.
Select files to be deleted:
- Individual
- Multiple
- All
All data
This deletes all user data from the 20|20. All settings, configurations, data, fields, and shapefiles will be deleted.
This is an irreversible operation. Once data is deleted, it cannot be recovered.
Update software
Select "Software Update" on the navigation tab to change the software version on the display base module and display.
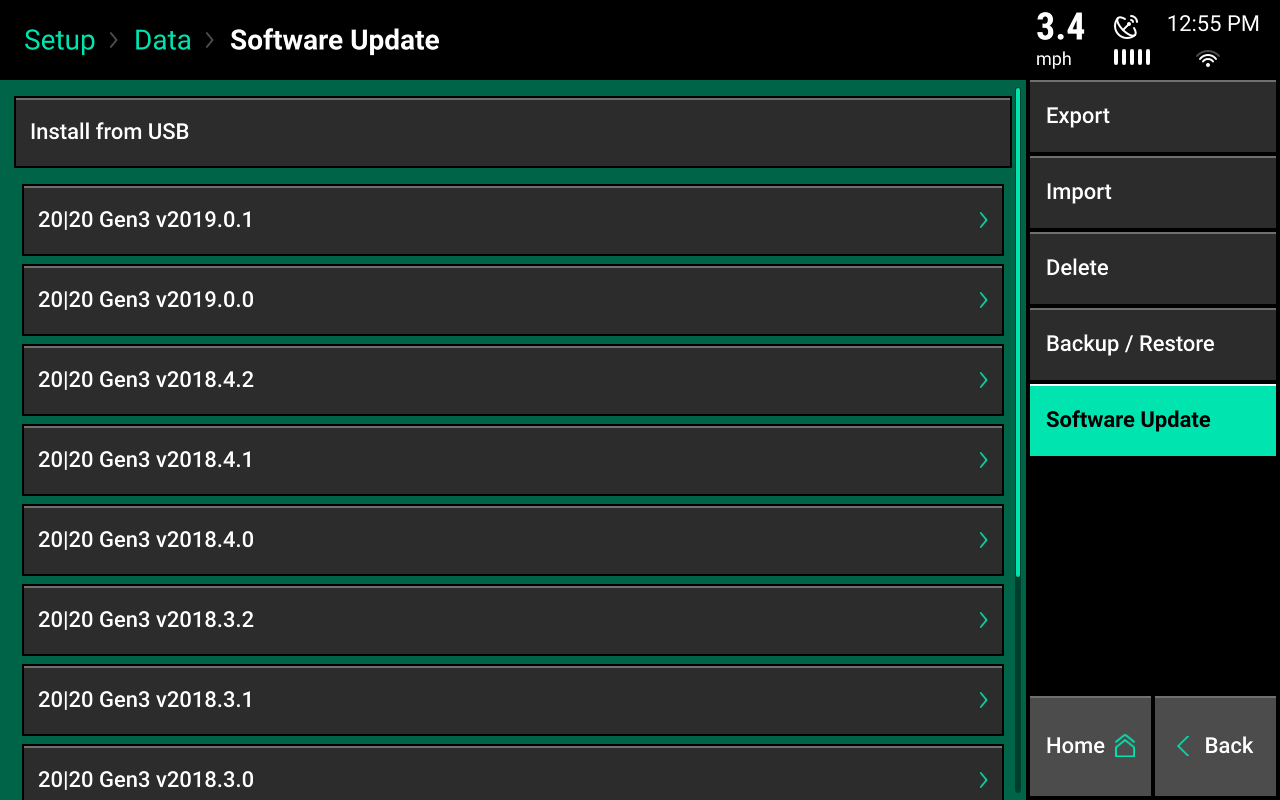
Install from USB
Software can be downloaded for free from the Precision Planting website and saved to a USB drive. Ensure the software file is on the root directory on the USB drive.
Software USB installation process
- Place the USB drive in the side of the display.
- Select "Install from USB."
- All software versions that are correctly saved to the USB drive will be displayed.
- Select the software version to update the monitor; wait for the monitor to reboot.
This process will update the display base module and display.
If two displays are connected, an extra reboot may be necessary for the second display to update. Alternatively, you may need to go through the update process a second time, with the USB stick plugged into the second display.
Install over WiFi
Software can be downloaded over WiFi once the system has been connected to WiFi. There will be a list of software versions below "Install from USB" that the system can be upgraded/downgraded to.