Crops Menu
Learn crops menu abilities and configurations.
Updated June 29, 2020
Configure crop type settings
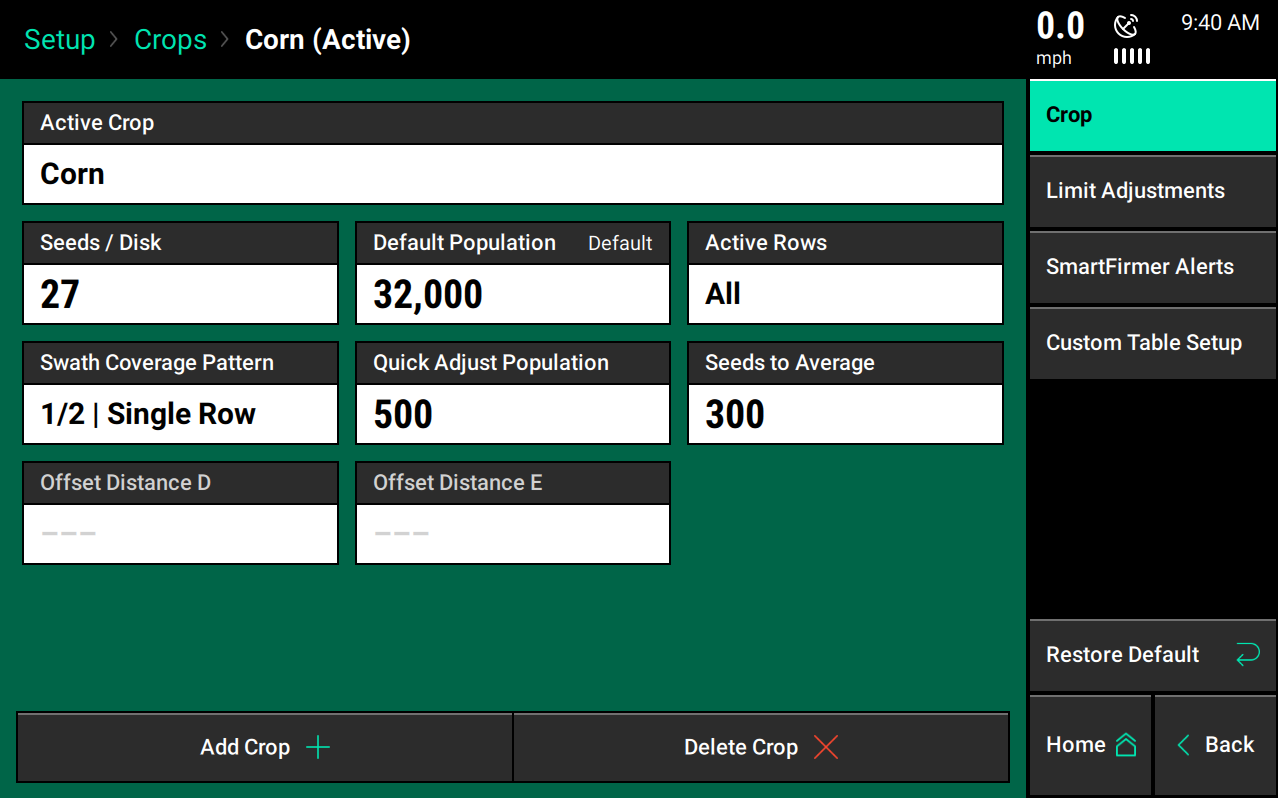
Configure monitor settings for individual crop types. Select the "Crops" menu button from the navigation pane. Settings within the crops menu are saved under active crop type and displayed at the top of the page.
Settings loaded
The active crop is the crop type saved for settings as they change. When you change the active crop type, all settings for the new crop load.
Settings loaded
- Adjustments settings
- Alerts settings
- Custom table setup

Liquid and SmartFirmer alert settings on the navigation pane will only be available if these systems are configured.
Change active crop type
Select the "Active Crop" button at the top of the page. Don't see the desired crop type? Select the "Add Crop" button at the bottom of the main crops page to view a list of all crop types that can be added.
Seeds and disk
The seeds and disk display is the number of cells/fingers in the seed meter. Available options are determined by the meter selected during planter setup.
Default population
The default population reflects the population motors will plant when operating in an area without a prescribed population. Using vSet Select or mSet systems? If so, a default tank/meter must also be set.
Active rows
Active rows are the rows expected to plant in a selected crop.
Corn split row planters common examples:
- Odd/even
- Left/right
Soybean split row planters common examples:
- All
Swath coverage pattern
Configure the swath coverage; select "Swath Coverage Pattern." This defines how the motors operate when entering and leaving already planted areas.
Row offset
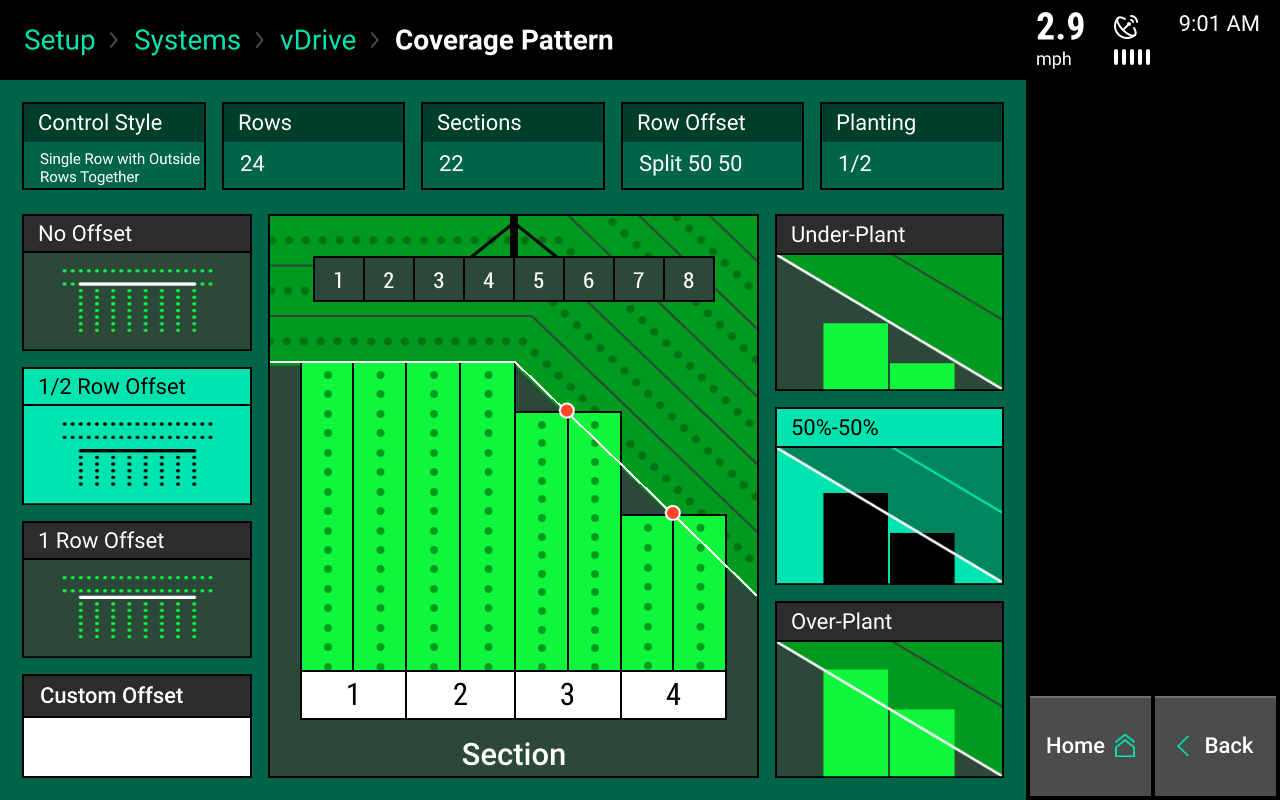
Find the row offset on the left-hand side of the screen. This is the distance from the headlands that seeds start and stop. On the right-hand side of the screen, find a coverage pattern to select. This is used when rows are tied together in swath sections. Determine how these swath sections control when entering/leaving prior coverage.

Single row swath
Single row swath sections can adjust the offset, but not the coverage pattern (due to each row acting independently of each other for swath control.) If any swath section has more than one row, then both the offset and coverage pattern can be adjusted.
Select offset
- No offset - The planter will place the last seed when stopping and the first seed when starting right at the beginning of the headland.
- 1/2 Row offset - The planter will stop/start seeding half the distance of the planter's row spacing from the headland.
- 1 Row offset - The planter will stop/start seeding one row from the headland.
- Custom offset - Manually set the distance away from the headlands the planter will start/stop seeding.
Select coverage
- Underplant - The section will shut off when the first row in the section hits the offset point.
- 50%-50% - The section will shut off when the middle of the section hits the offset point.
- Overplant - Will shut off the section when the last row in the section hits the offset point.
"Section" refers to the swath sections that were set up for the swath control style in vDrive setup. Each section will control independently of each other.
Quick adjust population
This defines the number of seeds that will be added or subtracted to the population when using the plus and minus buttons in the vDrive control page. See the vDrive operations guide for more information.
Seeds to average
This defines the number of seeds used in the rolling average of seed data to calculate population, singulation, and Seed Release Index (SRI). This should be set to about 1% of the expected population.
Offset distance D + E
When the GPS offset measurements for the left/right offsets of split row planters (frame type: dual front and dual rear) change for different crop types (i.e. using a hitch offset) the offset measurements can be stored on a crop by crop basis.
Distance D + E corresponds to boxes D + E in the planter measurement screen. If the left/right offsets do not change with the crop being planted, do not enter a value.